
06 Jul 10 Steps to Baking a Texas Perfect Peachy Pie!
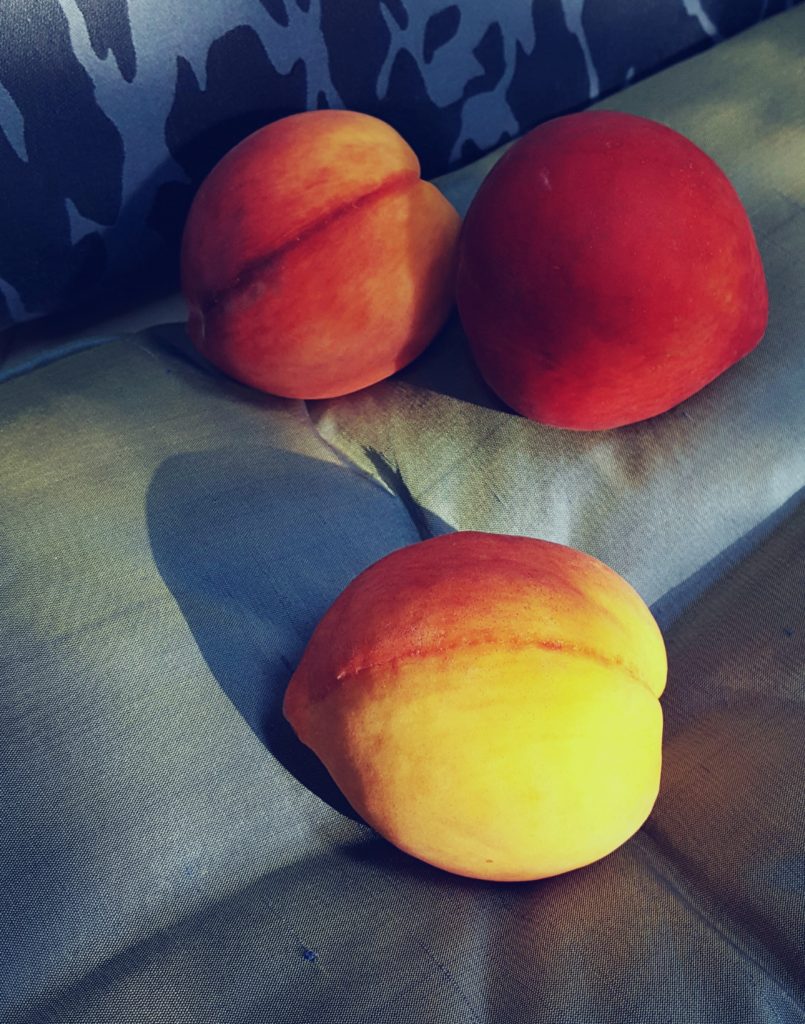
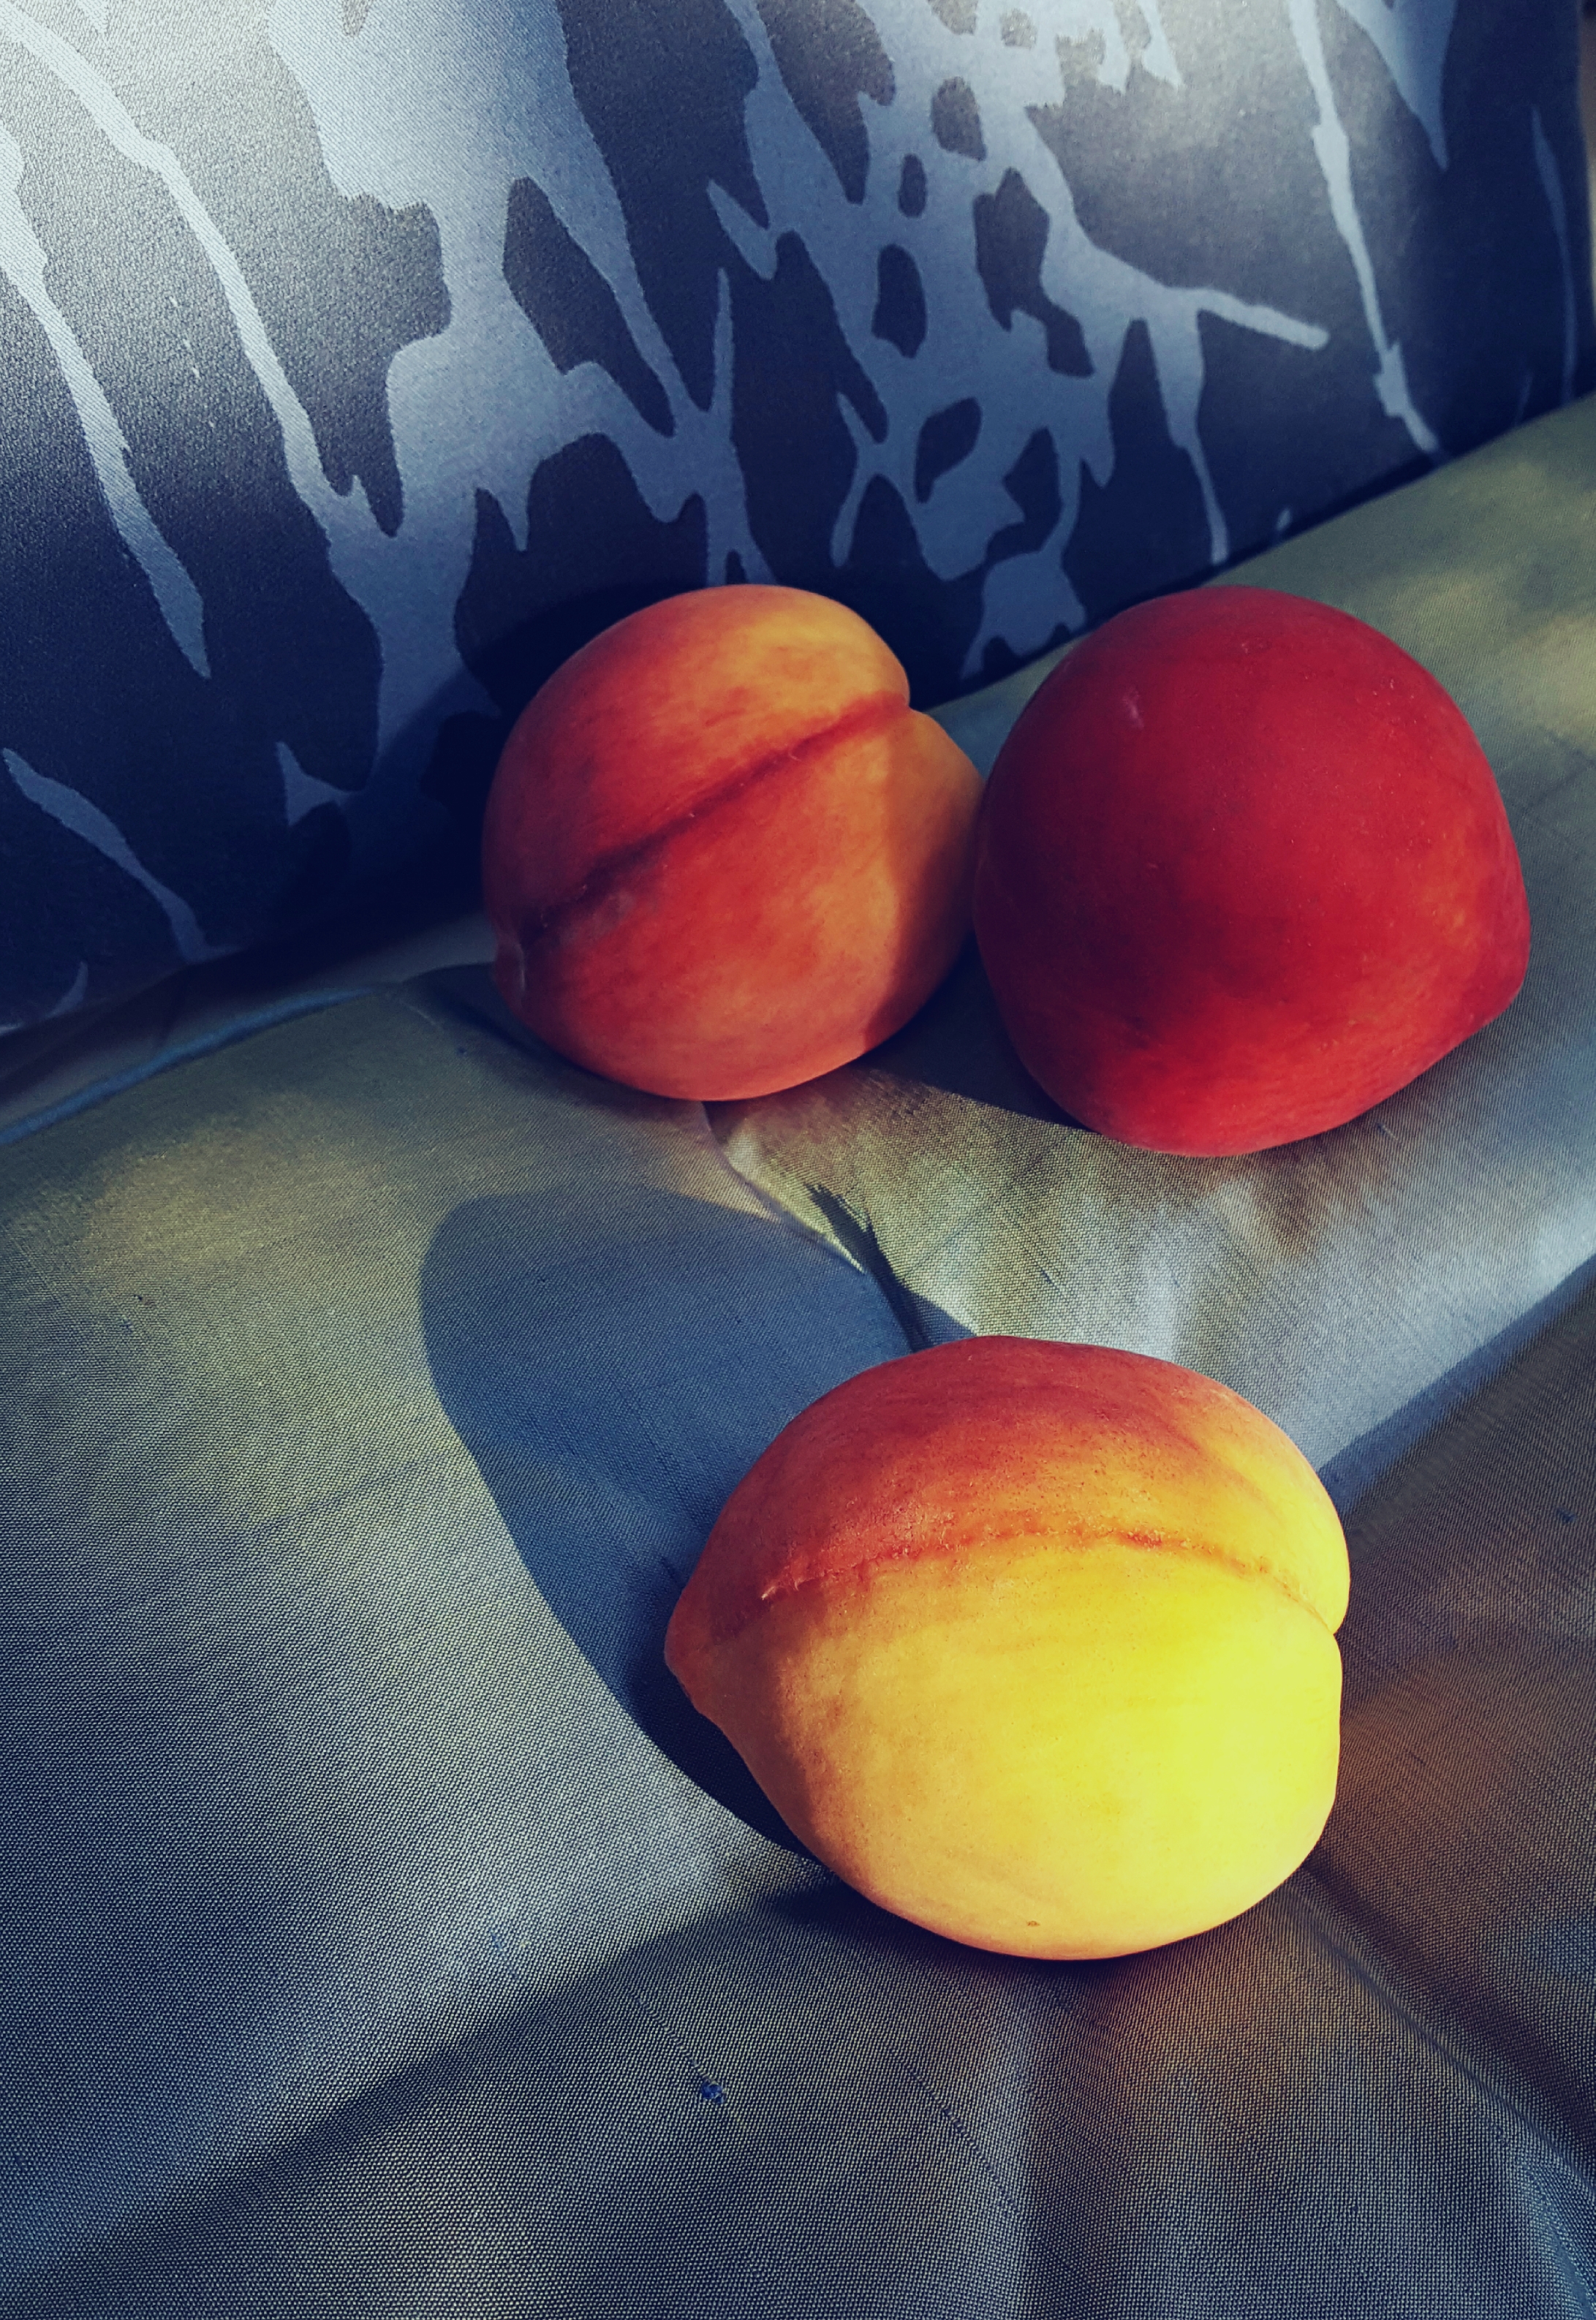
A still life of Texas peaches. I’ve always loved Texas peaches for their beautiful colors, like a really pretty West Texas sunset lighting up the big sky. They’re delicious too! So this 4th of July, my only goal was to bake a peach pie with a lattice top from scratch. Since it was a low-key day for my husband and me, that’s exactly what I did on this national holiday.
You see, I haven’t baked a pie in over two years. Eaten plenty. But a couple Thanksgivings ago I baked a lattice topped apple pie and it turned out horrible. It was so bad, I had to toss it in the trash. I have no idea what happened. I’d baked pies many times before, but this one looked and tasted like cardboard.
So when our Texas peaches we order every summer from the Northwest Austin Kiwanis Club arrived BEFORE the 4th of July, well there was not going to be a red, white and blue dessert. Instead, I was determined to try to bake again. You know, get back up on the horse, as the expression goes.
I didn’t want to whip up an easy cobbler. I wanted to get my confidence back baking a lattice topped pie. There’s tons of recipes online, and I picked a good one, Natasha’s Kitchen’s Perfect Peach Pie, and kept my fingers crossed. I turned some music on and it was very relaxing because I love to bake. Baking to me is like art, creating and designing but with food ingredients instead of textiles. What I did differently this time, is I really took my time and triple checked my ingredients every step of the way.
Natasha’s pie crust is actually a modified version of one from Joy of Cooking Cookbook. Not light on calories, but that secret ingredient sure made it tasty.
You too can create a real purty peach pie by following Natasha’s Kitchen recipe to a T. I’m so proud of it, I just had to share it with y’all!!
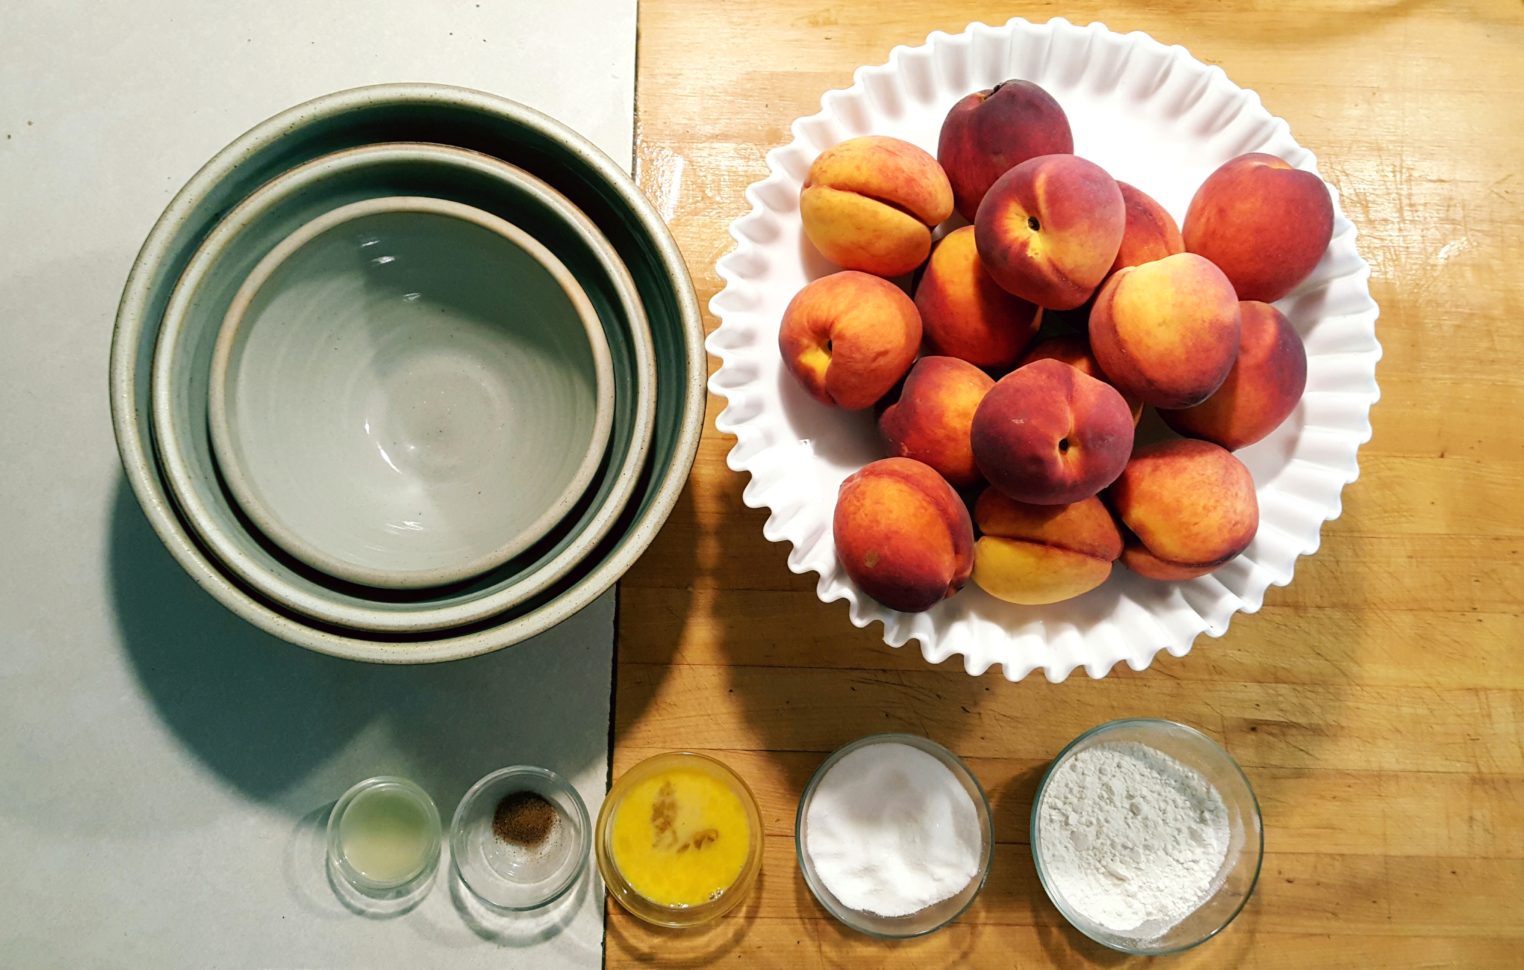
STEP 1: Peaches and mixing bowls
Start with some ripe, delicious Texas peaches. We order 2 cases every year from the Kiwanis Club because we like to give them to friends. Recipe calls for 3 lbs, so I had set aside at least a dozen, as this is a deep dish pie recipe.
I love breaking out my set of sturdy pottery mixing bowls. My Mom bought them for me one time when we were visiting Gruene, Texas, a small German town South of Austin. They are super heavy and perfect for baking. There’s nothing like a strong set of mixing bowls to make baking easier. These actually have a pretty Terra Cotta color on the outside with a cobalt blue band on the edge. I also have a set of clear glass nesting bowls and they’re perfect for getting all your ingredients lined up. And I collect vintage Fenton Hobnail milk glass and like to display the peaches in this compote stand.
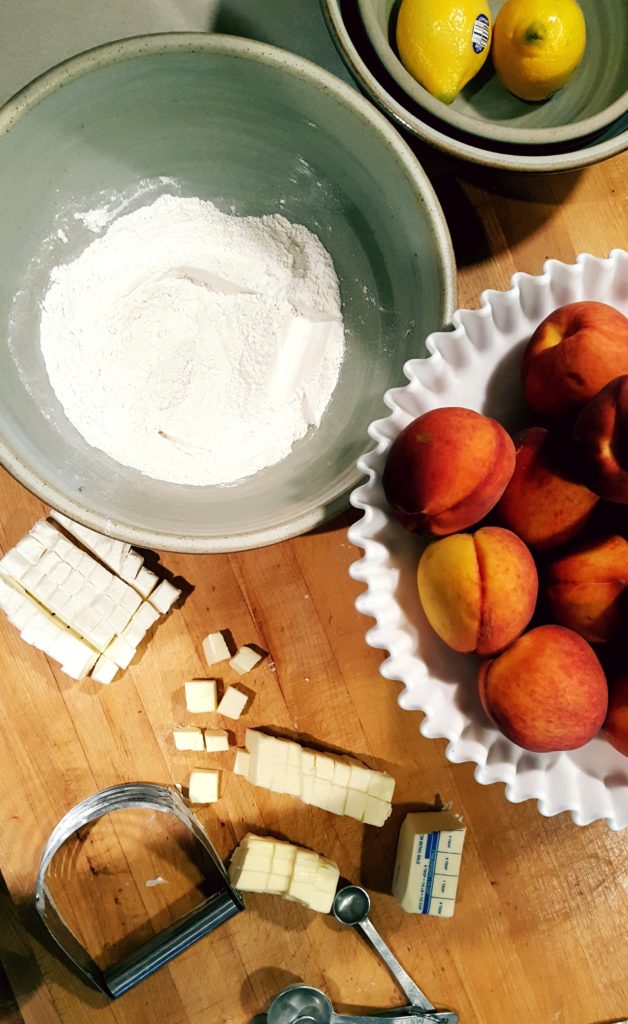
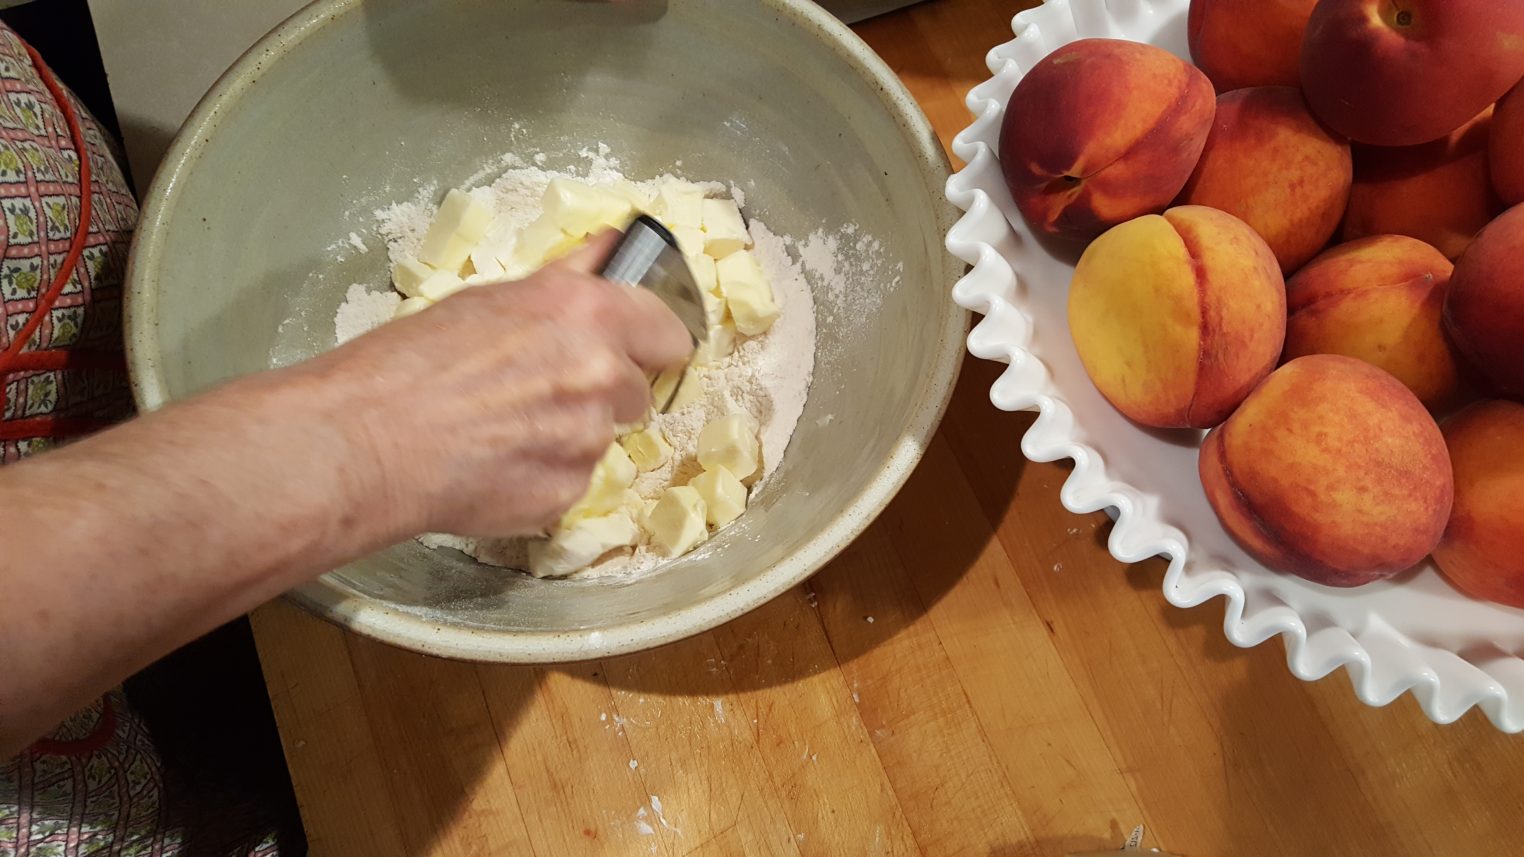
STEP 2: Dough preparation
Get the dough ready, as it needs to chill at least one hour. Also make sure all the other ingredients are cold right out of the fridge. I’m not sure the science behind it, but the coldness of your ingredients makes a big difference in the consistency of your dough for the crust.
One ingredient is unsalted butter, but I only had salted, so used that. Unsalted is best for baking, but I’m not sure why. I just know most baking recipes call for unsalted butter.
Can you guess the other ingredient? Hint- it’s white and creamy. I really liked how this recipe had you cut them up into 1/2 inch cubes. It made for kneading the dough a lot easier.
As the recipe calls for, you split the dough on half, wrapping each in Saran Wrap, and then refrigerate the dough for one hour. Here’s the best pie crust recipe from Natasha’s Kitchen.
Can you believe my husband held out on me for 2 years by not telling me we had a Pastry Blender!?!
STEP 3: Roll out the dough
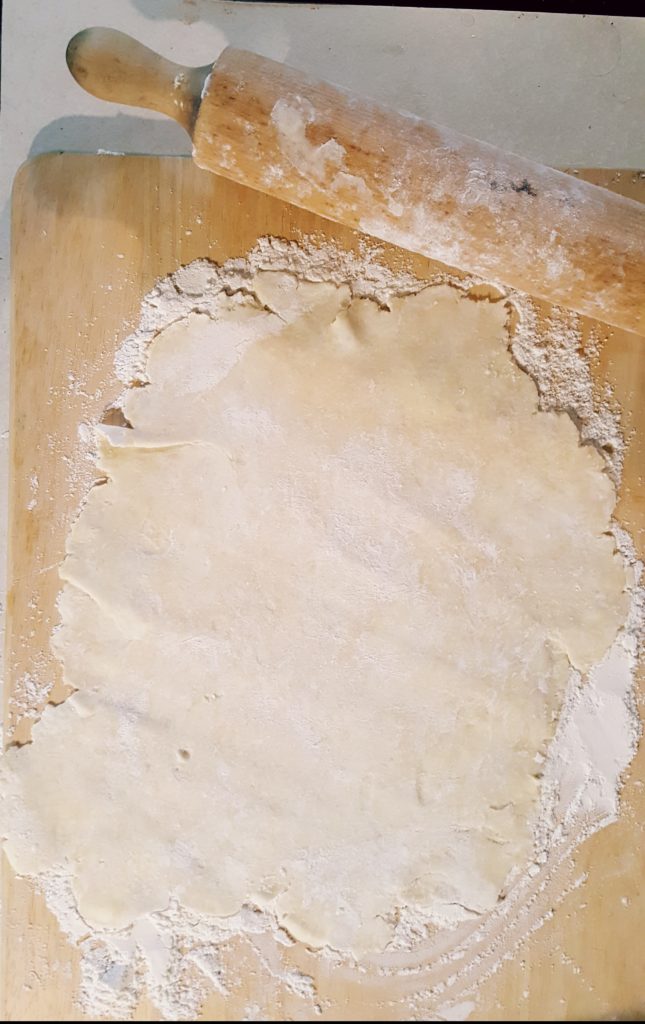
This step is always the one that trips me up, and where I messed up on that apple pie a couple years ago. I don’t know about you, but my dough NEVER rolls out into a perfect circle. You really need to have flour on the cutting board or counter surface unless you’re using wax paper. Otherwise the dough will stick. A good solid rolling pin that is one solid piece of wood is helpful too. You can find a vintage one at an antique store. My stepmother gave me this one for Christmas when I was in my early 20’s in my first apartment.
You roll out one piece of the dough (above) that goes into the pie dish. Then you cover and refrigerate it while you work on the peaches.
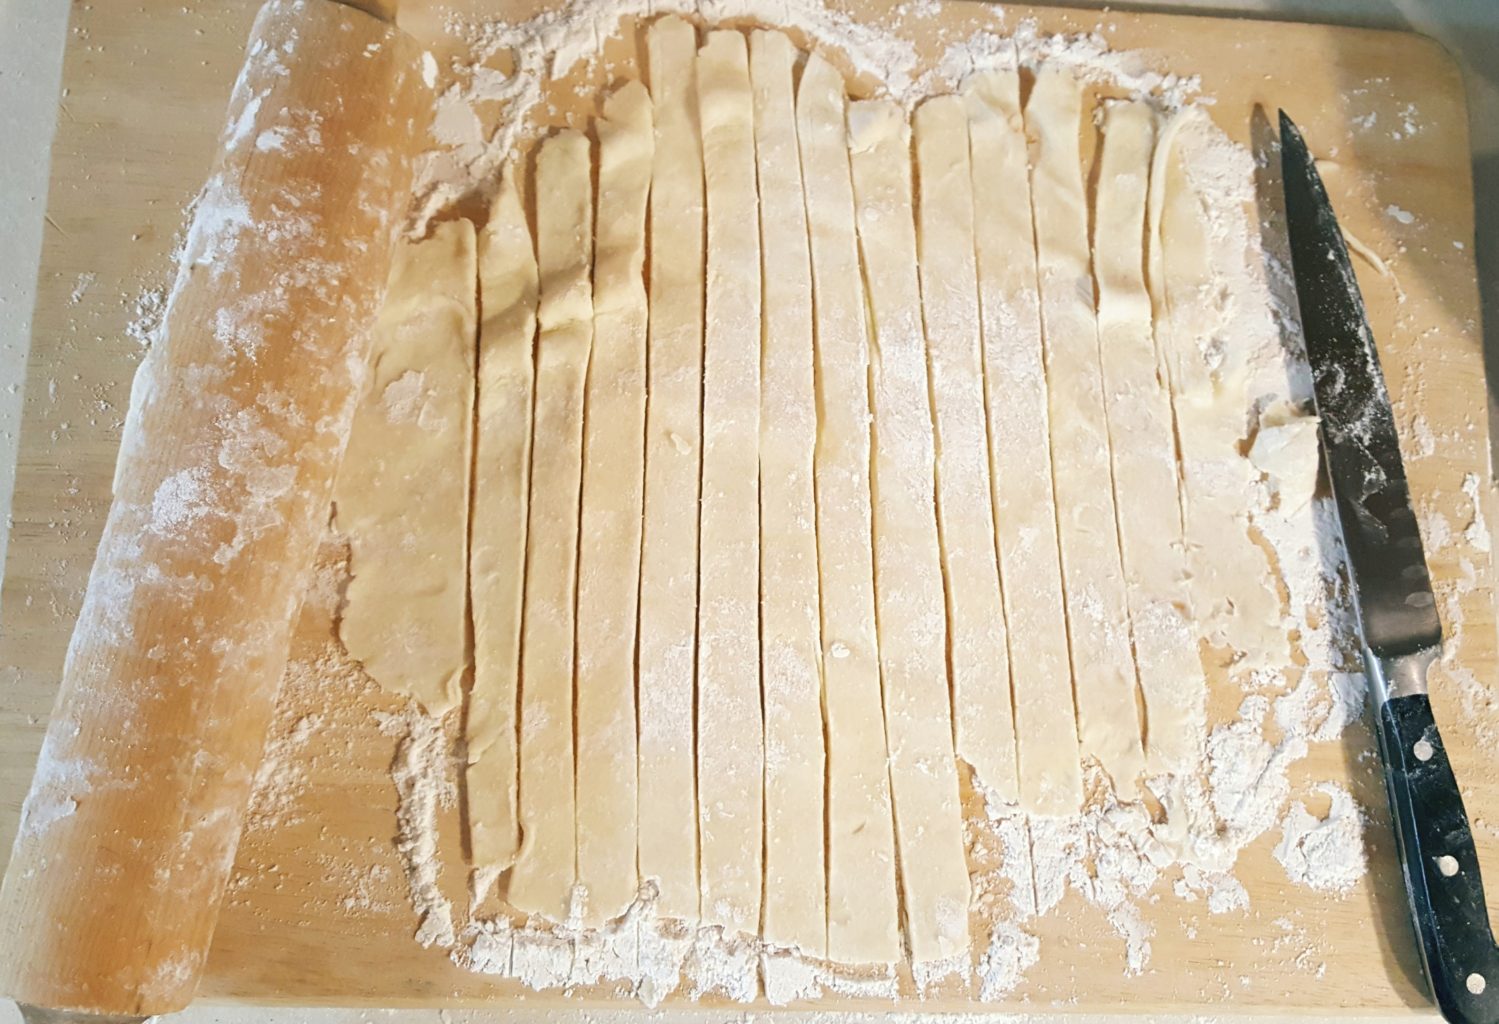
Next you roll out the second piece of dough and cut it into strips. These strips are for you to weave together to create the lattice pie top. Instructions coming up soon. Be sure to read the recipe, because you want to save your longest strips for the middle of the pie.
STEP 4: Blanch and peel peaches
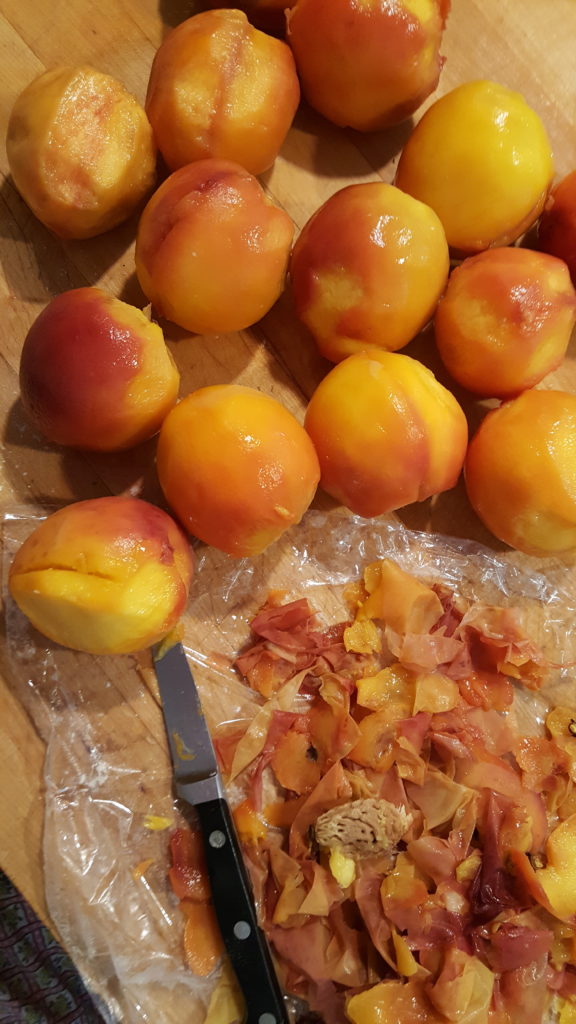
If you’ve never blanched anything before, it’s a simple process of placing the peaches in a pot of boiling water for one minute. This loosens the skin from the peach so it’s super easy to peel the peach without losing chunks of the peach when you peel them unblanched. (Did that sentence make sense?)
It’s a messy process, but then you slice them. So the reward is popping a couple peach slices in your mouth during the process. Yummy! Then you’ve got yourself a nice big bowl of sliced peaches.

STEP 5: Mix in your dry ingredients
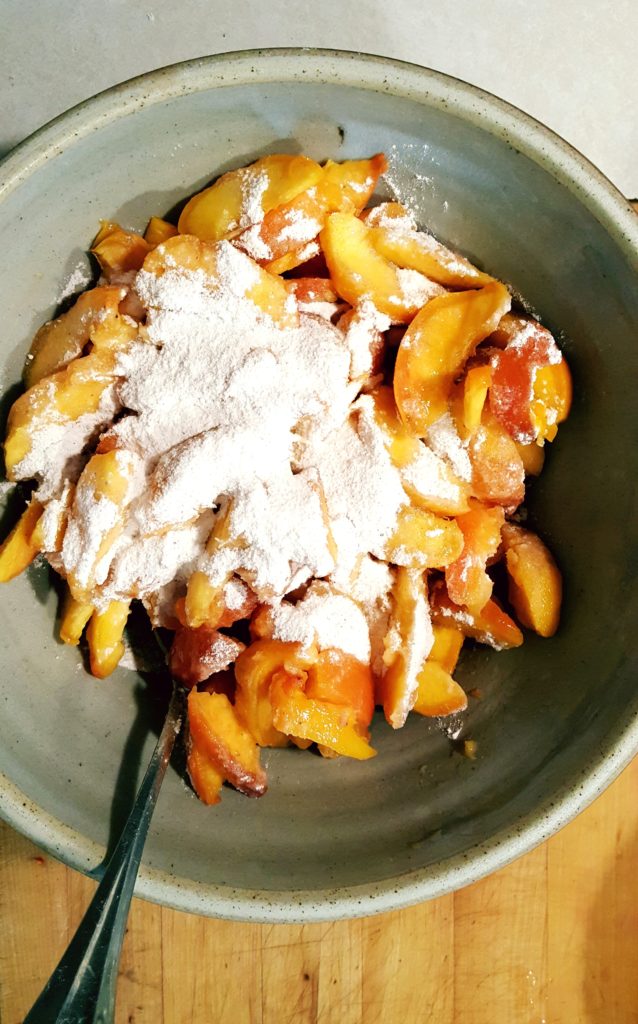
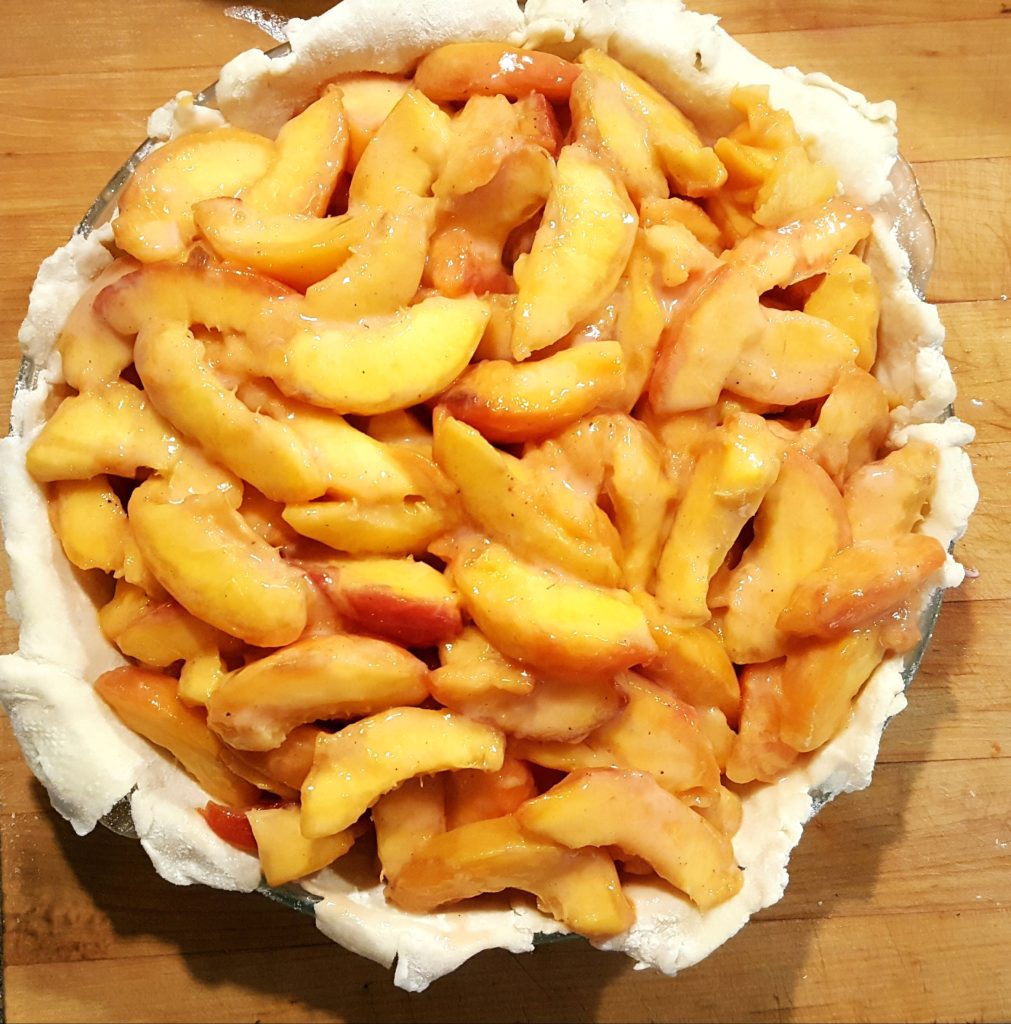
Once you gently mix in your dry ingredients (baking 101 rule is to keep your dry ingredients in one bowl; wet in the other) you take out the pie dish from refrig and fill it up with peaches. I like to have it really full cause the peaches cook down. As you can see, my pie crust doesn’t cover the edge like it should.
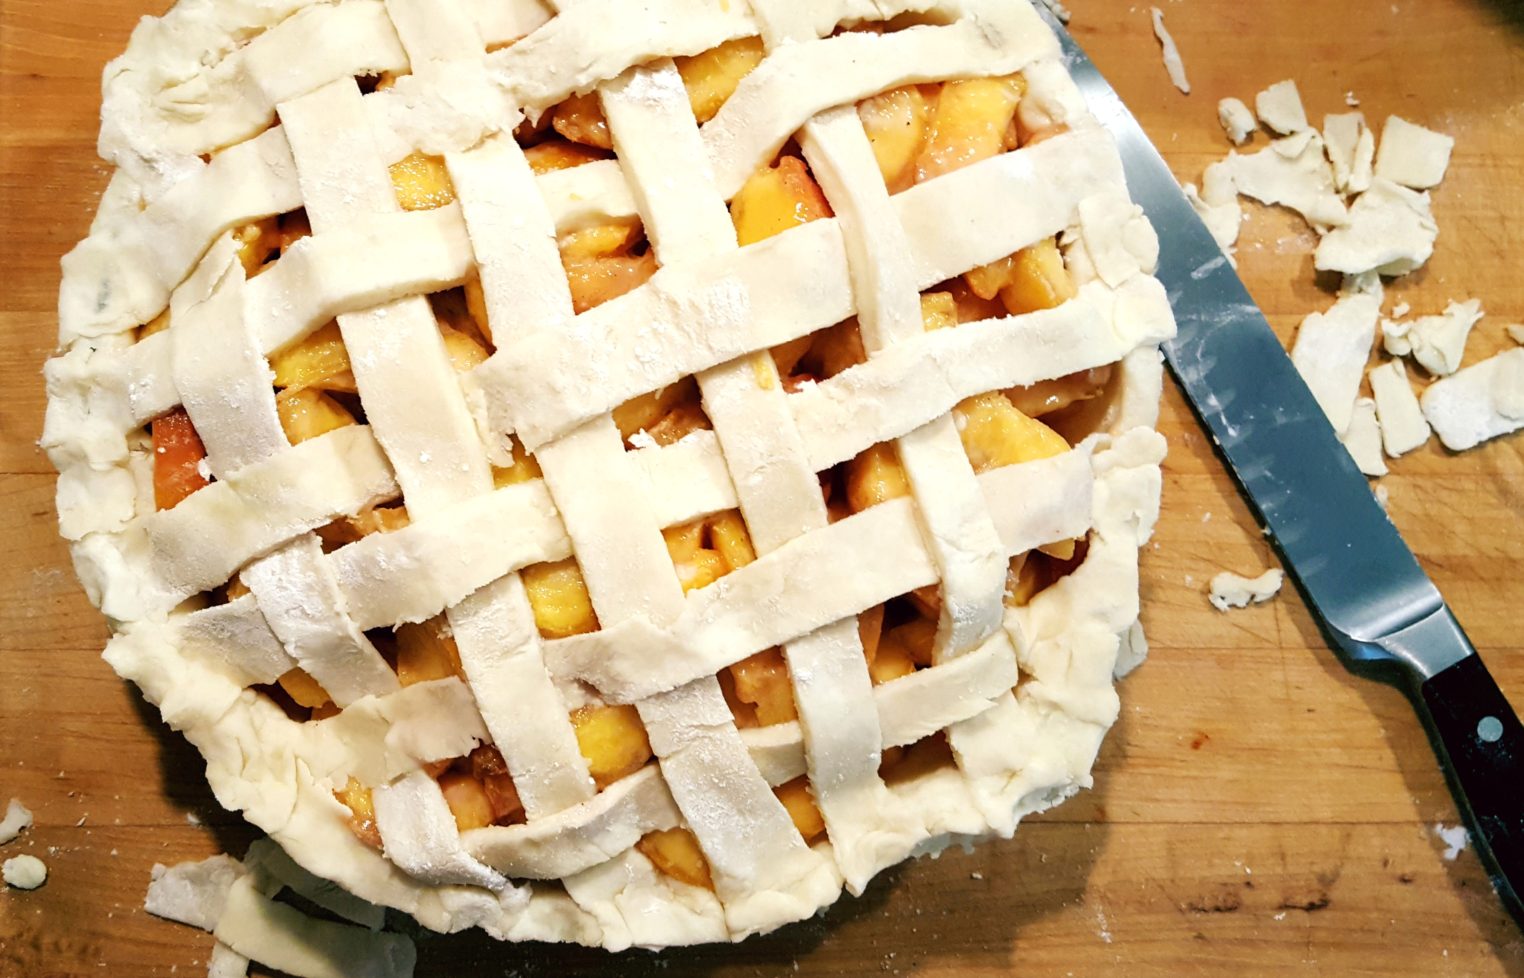
STEP 6: Create lattice top
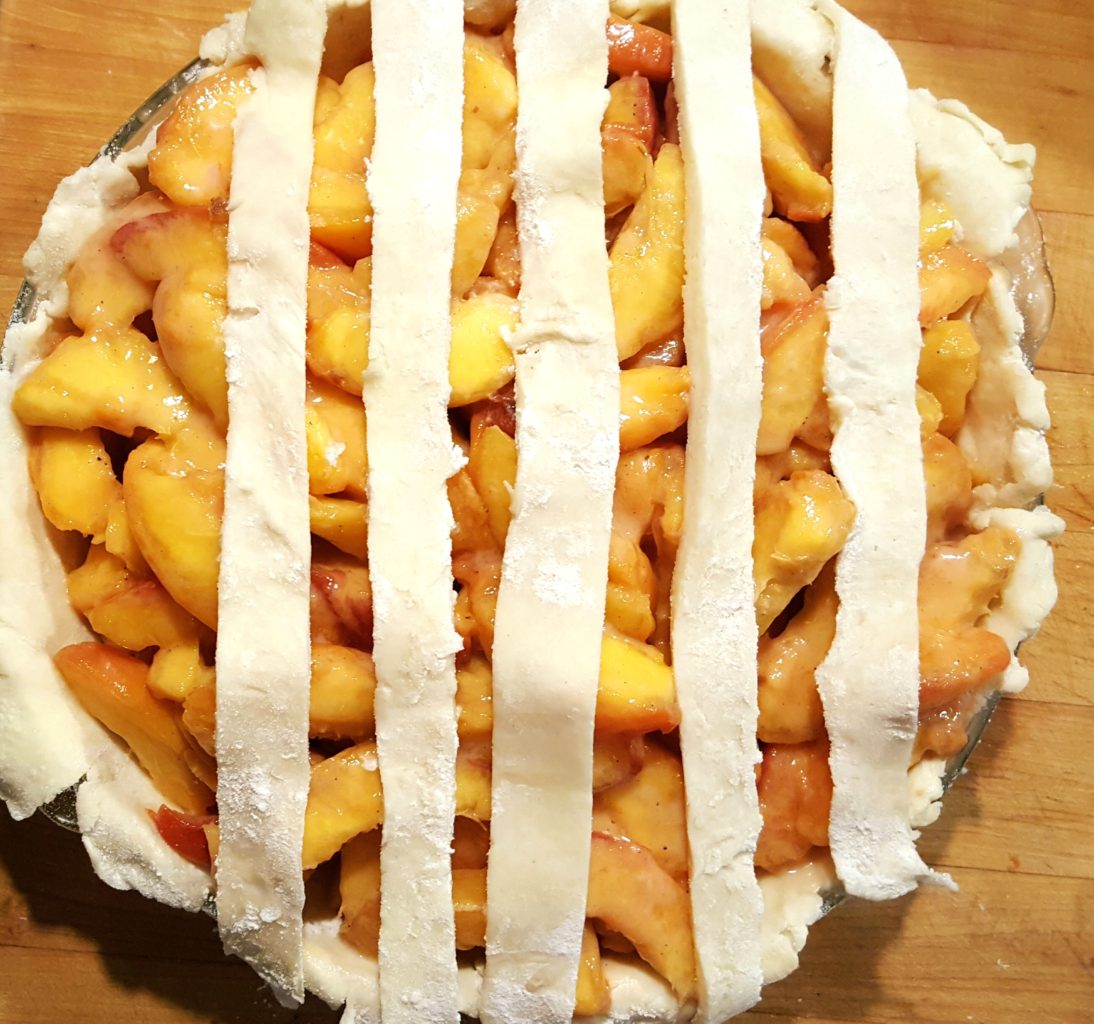
Here’s where the challenging part starts but this time I learned something new. Most of you have probably already watched a hundred YouTube videos on this, but the images in the recipe worked just fine for me. It was super easy to fold every other strip half way back to lay the cross strips down. I used to do it the hard way and actually try to weave them…lol! This method is way easier.

But not without some tense moments, as you can see below Im doing some patch work. I fretted that my dough strips were falling apart in some areas, but you could not tell in the finished pie, so take my word, it’s not worth fretting about.
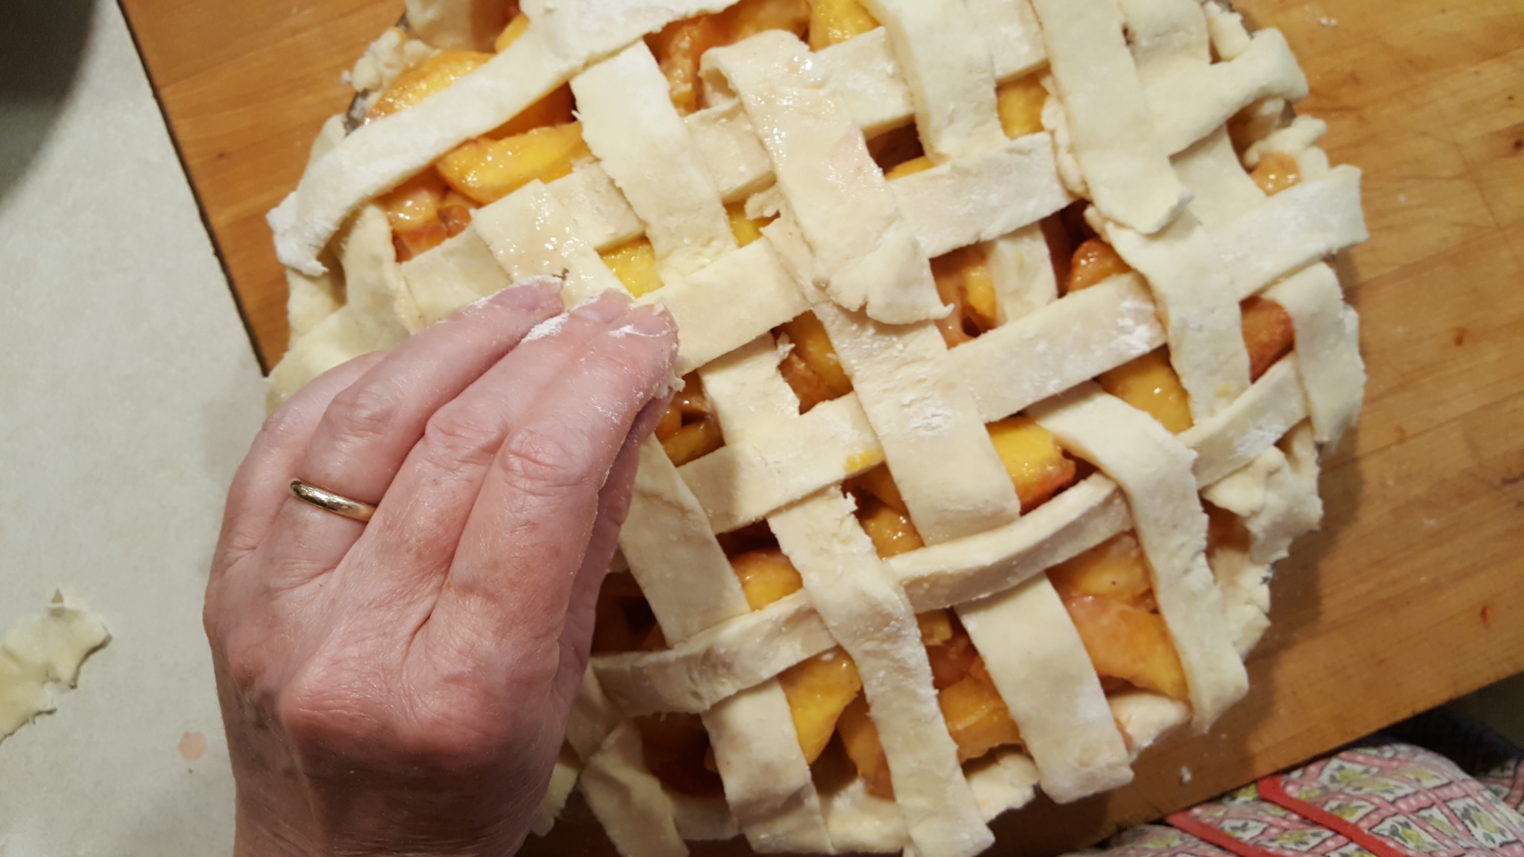
I was tickled pink that my lattice design worked! This method of creating a lattice top in this pie crust recipe is perfectly clear. My confidence was starting to slowly come back.
STEP 7: Trim pie edge
Then you’ve got to trim the extra dough hanging off the edge and pinch the edges to make it look pretty. I still don’t have this part down perfectly yet. Still learning.
STEP 8: Coat top of pie
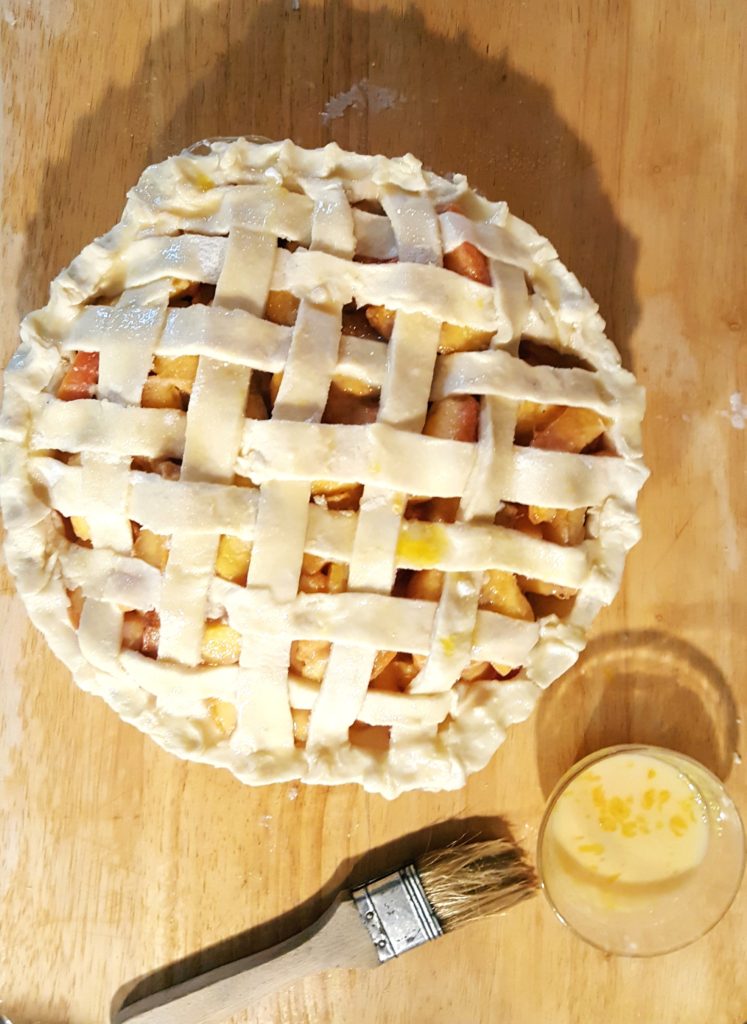
This last step is THE step which makes your crust a beautiful crispy golden brown color. A little egg white and water brushed on top generously does the trick. I sprinkled it with sugar to top it off.
STEP 9: Pop it into the oven
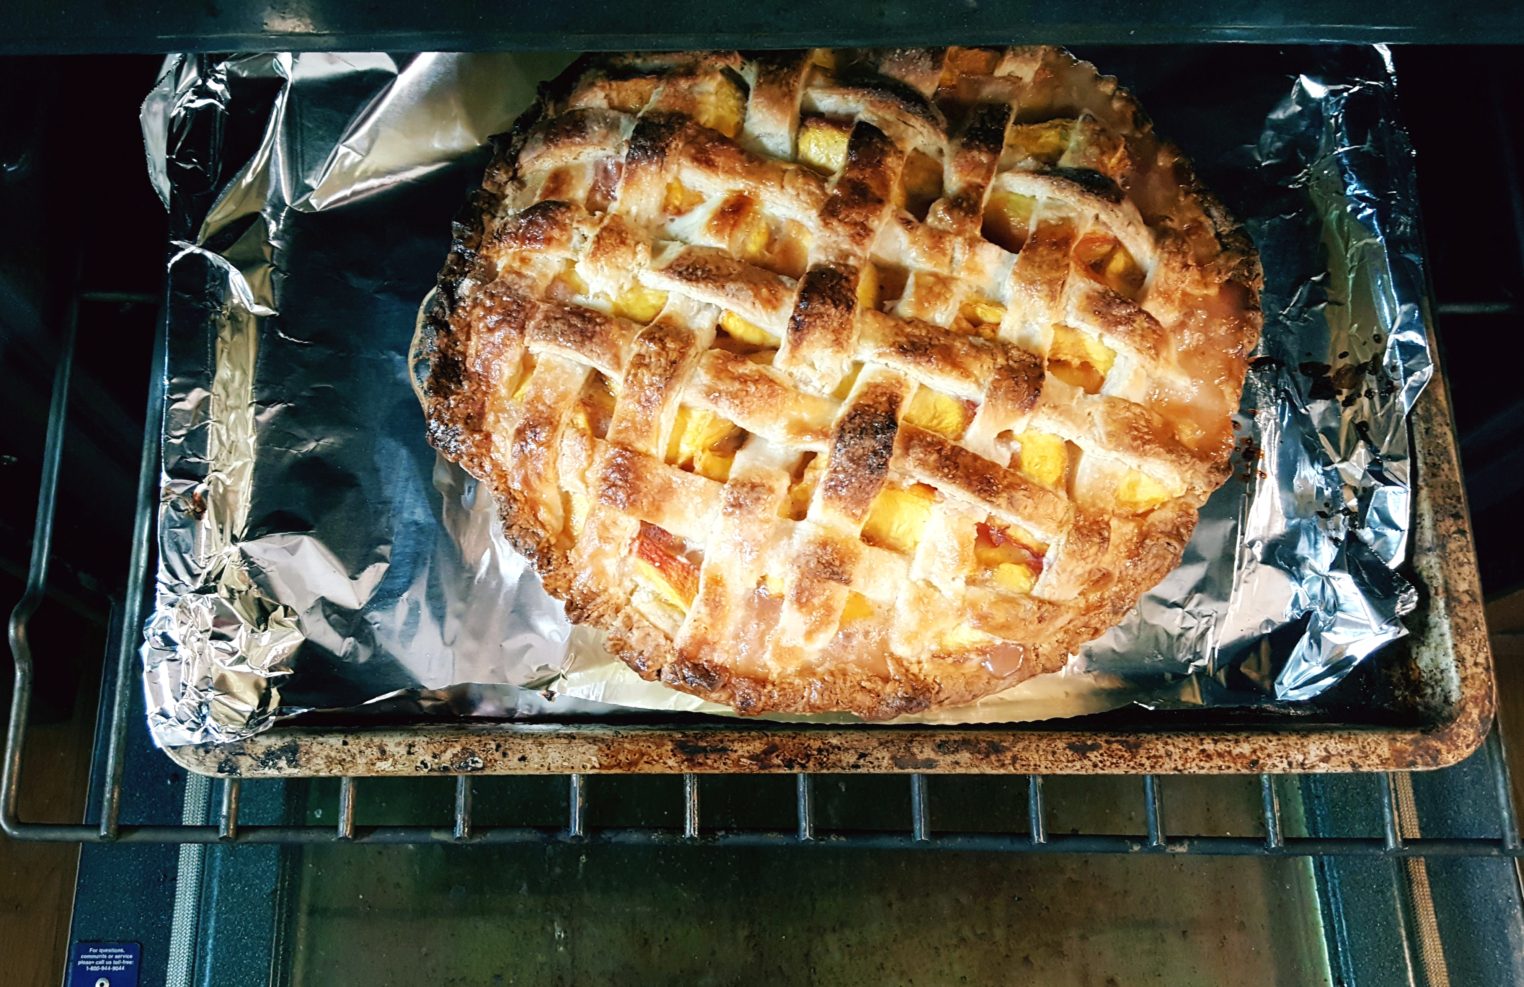
You are now ready for the next to last step, to pop it in the oven and bake it. But PLEASE see recipe for important temperature details and read carefully. It goes into the oven at a higher temp for 20 min without a pan underneath it. Everything went so perfectly until this step.
I must have left it in a little too long because before I knew it, the entire oven was smoking. My luck, right? It happens a lot with our old oven, as drippings will cause the oven to smoke. It will eventually burn off and stop, but not before we had to open all the doors and turn the ceiling fans on full blast!!! Ugh!! And it was all going so smoothly. I had visions of my peach pie tasting like a “smoked” peach pie.
When you turn the oven temp down, THAT is when you put the pie dish on a foil lined baking sheet pan to catch the juicevdrippings. I was just about 5 minutes late on that step, so watch your time!
STEP 10: Take pie out of oven
Ah, the final step, the glorious part. To open up my oven and see a picture perfect golden brown lattice peach pie was sheer joy!!! I couldn’t believe it. I did it!!! And it DID turn out as pretty as the recipe photos. Now the real test was how was it going to taste.
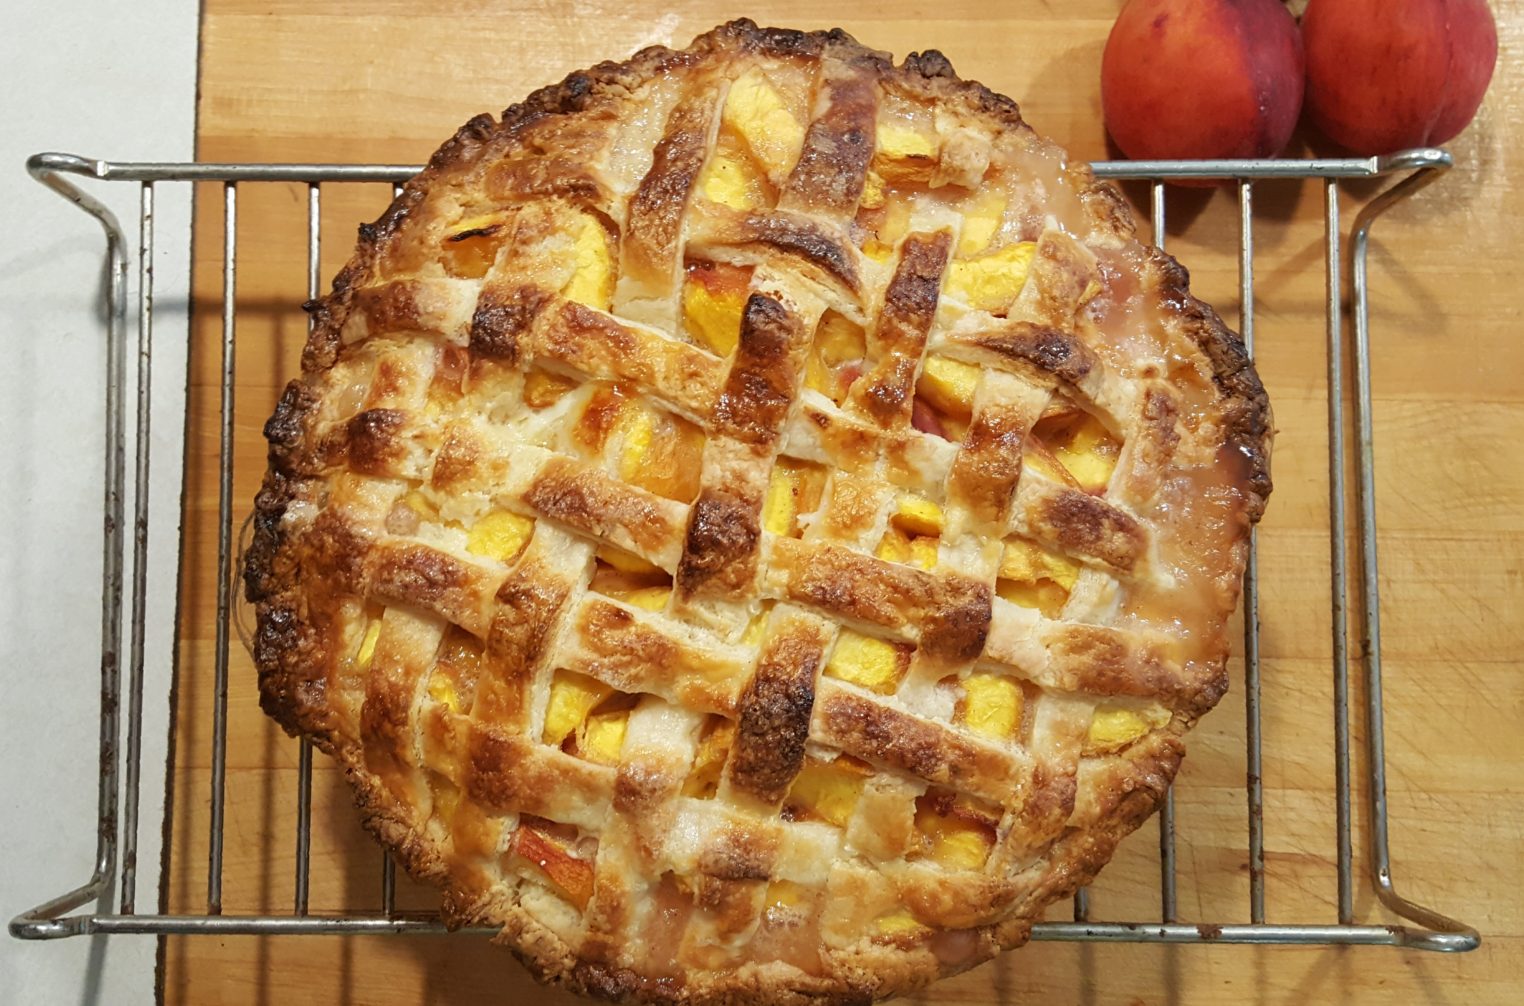
IMPORTANT NOTE: You must let it cool for a couple hours so that the liquid surrounding the peaches has a chance to set, so it’s firm and not all runny when you slice it.
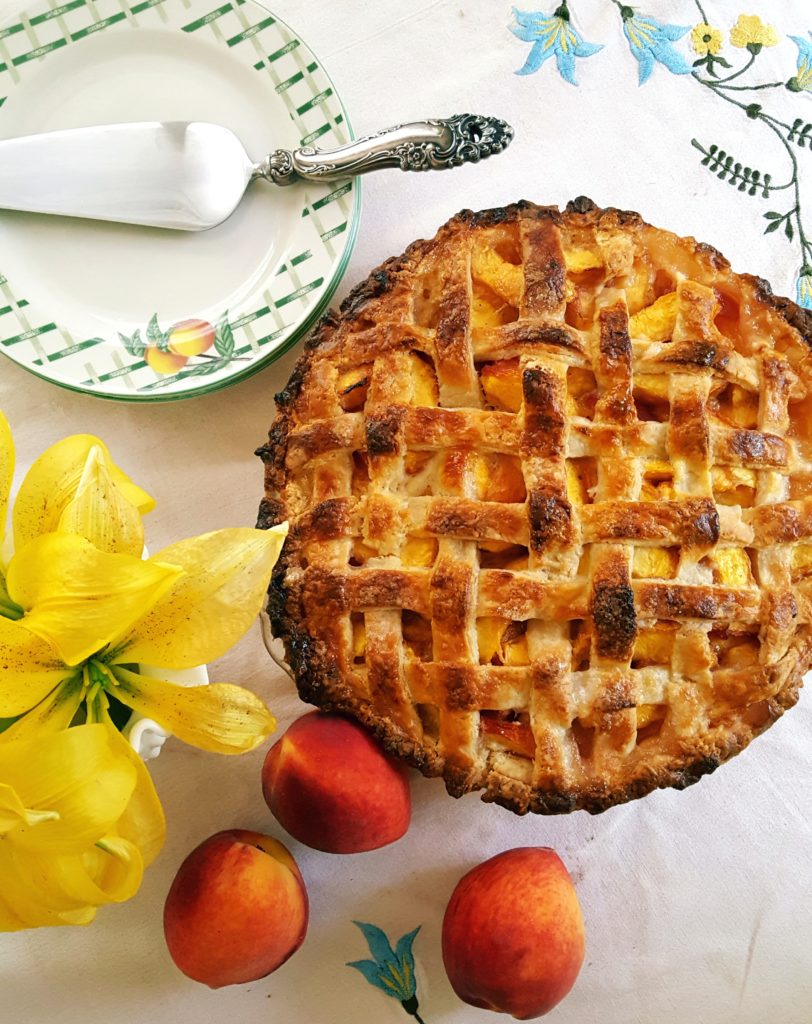
Now, what do you think? Isn’t my pie pretty? I was SO elated I took tons of photos of it!!! Please follow The Pillow Goddess on Instagram to see more in my Stories.
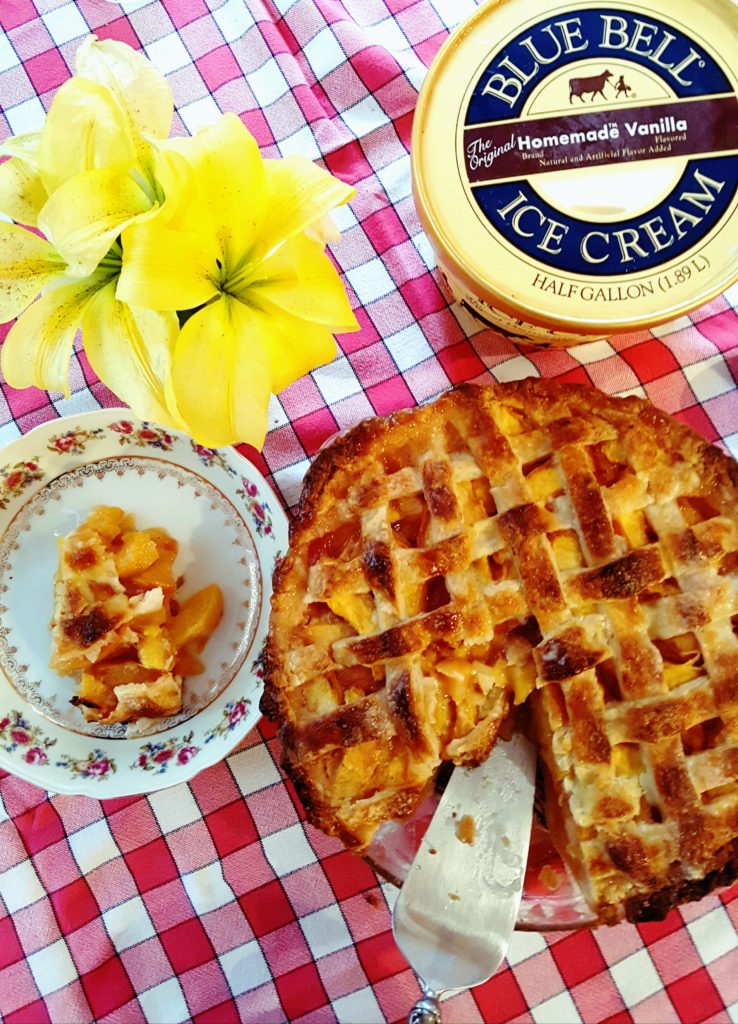
We had to wait 2 hours to try it, but when we did…..oh boy, was it good. The final step is to serve it up with good ‘ole Texas Blue Bell icecream. And you know in Texas, you cannot serve peach pie or cobbler without Blue Bell Homemade Vanilla ice cream. Seriously, it is against the law!! Texas peaches and Texas Blue Bell ice cream were practically born together! You can have vanilla ice cream by itself, but in my book, you cannot have peach pie without Blue Bell Homemade Vanilla.
Got the itch to bake a pie yet? Give it a try, as I know you’ll be pleased as punch with how Natasha’s Kitchen Perfect Peach Pie recipe turns out. I got lucky and picked a winner. Be sure to follow the recipe carefully step by step, as that did the trick for me. Baking this Perfect Peachy Pie, and eating it while watching A Capitol Fourth fireworks, made our 4th of July an extra special celebration – as American as Peach (or Apple) Pie!

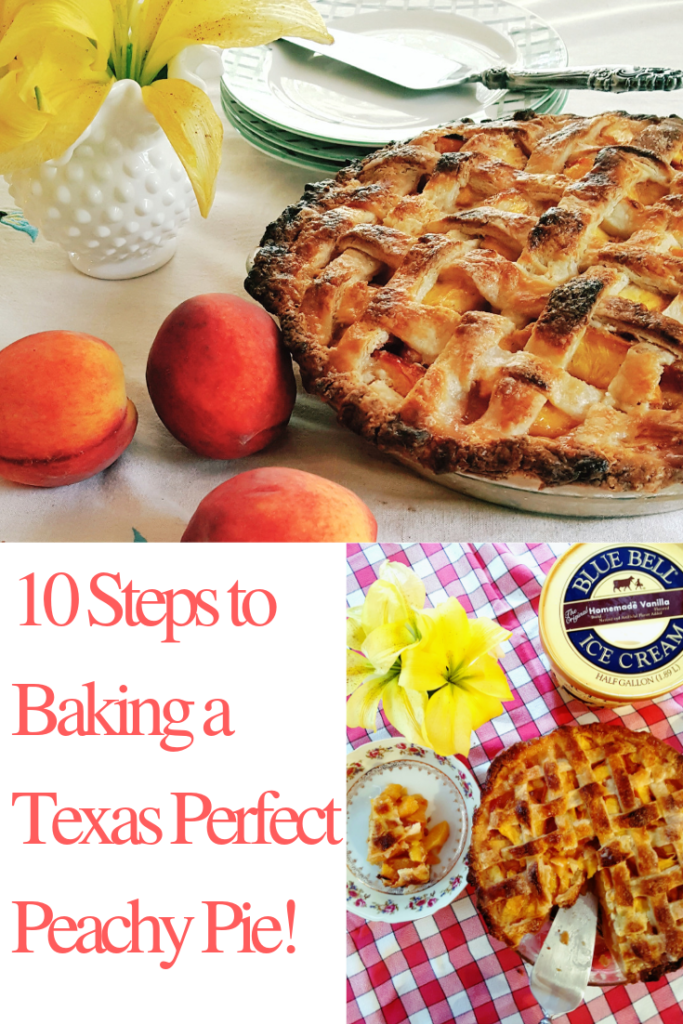
Please Pin this image below to Pinterest so everyone can enjoy baking a Texas Perfect Peachy Pie!
Till next time, Happy 4th of July, enjoy your holiday weekend, and be sure to spend some time relaxing this summer by baking a sweet treat. I promise it will be worth it! XO PG
NOTE: All images and opinions are my own. Peach pie recipe is from Natasha’s Kitchen.
Sandra Alvarez
Posted at 09:33h, 06 Julybeautiful pics and looks so yummy!
Deborah Main
Posted at 22:09h, 07 JulyThanks Sandy! It was delicious! So pleased O was able to finally make a lattice top pie 🙂
Lisa Peck
Posted at 11:11h, 06 JulyGreat post! love a good peach pie!
Deborah Main
Posted at 22:10h, 07 JulyThank you Lisa. I was happy to discover one 🙂
Anne
Posted at 13:39h, 06 JulyThat is a beautiful pie! Congratulations!
Deborah Main
Posted at 22:12h, 07 JulyThank you Anne! Definitely have gotten back into baking. Now that I know I can make a lattice pie, I’ll be all set for the fall. 🙂
Janet Lorusso
Posted at 16:07h, 06 JulyOh my! I ADORE anything made with peaches! This is making my mouth water…beautifully done!
Deborah Main
Posted at 22:12h, 07 JulyThank you Janet!! I’m so glad it looks tasty to you. It’s definitely a great recipe! 🙂
Carla Aston
Posted at 22:30h, 06 JulyLooks so yummy! Love all the step by step photos. Perfect pie for all those summer peaches!
Deborah Main
Posted at 22:14h, 07 JulyThank you Carla for the feedback about the steps. Of course the recipe has them in more detail, but I thought it would be fun to share my pics along the way. There’s nothing like peach pie with Blue Bell vanilla in the summer, for sure!
Leslie Carothers
Posted at 08:37h, 07 JulyDeborah: This may be my favorite post of yours, ever. I love how you shared your successes..and the things to look out for…and how you used some of your Mom’s things to bake this with. Those memories are what make it taste even better in the end.
There is NOTHING I love better than Texas peaches and you may have just convinced me to give this a try.
Deborah Main
Posted at 22:18h, 07 JulyOh Leslie, that is so sweet of you to say, thank you! Appreciate the feedback on the steps. You’re so right…having that memory with my Mom of picking out that set of mixing bowls together will be one I can pass down to my daughter someday. With the peach pie recipe too.
Texas peaches ARE the best!! I hope you enjoy some this summer for sure. 🙂
Sheri Bruneau
Posted at 08:51h, 07 JulyI’m not a huge pie lover, but peach pie is my favorite! Thank you for sharing your recipe. I’ll be sure to try it out this summer.
Deborah Main
Posted at 22:19h, 07 JulyIm so glad that peach pie is your fave Sheri! Enjoy and thanks for stopping by the blog. 🙂