

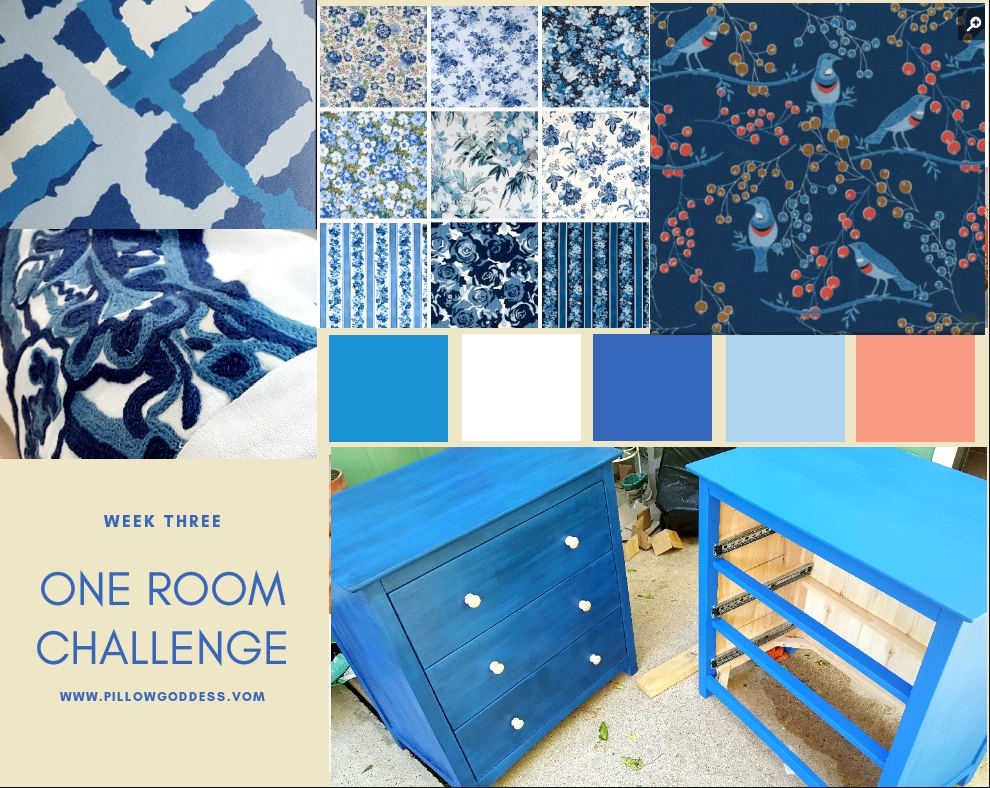
18 Apr On No! It’s Too Blue! 10 Steps to Painting a Chest of Drawers – One Room Challenge Week 3
Hallalujah!!! We’re at the halfway point of the 6-week One Room Challenge and I couldn’t be happier, but that’s just at this very moment. Let me tell you, I’ve learned first hand that the challenge seems to produce Waves of Calm and Waves of Panic and I’m sharing some of that with you today. And yes, I’m giving you a sneak peek of the wallpaper you’ve been so patiently waiting for!
If you are reading the blog for the first time, you can catch up on the One Room Challenge Guest Participants link HERE (I’m number 116 in Week 1 and 115 in Week 2) and the direct links to my blog below:

Now let’s get going on WEEK THREE. Since we’re exactly at the half-way point of the One Room Challenge (ORC), let’s hit the highlights first. Here are my definitions of my “process” during the ORC.
Wave of Calm = All is going smoothly just as planned. Very confident my Bold Blue Bedroom will turn out beautifully.
Wave of Panic = All is NOT going smoothly. There are bumps in the road, both little and BIG, delays in receiving products, impatiently waiting for the FED EX truck to arrive, stress, and a lot of indecision.
Now let’s check in to see where we are in the transformation of the girls old lavender bedroom into the “BOLD BLUE BEDROOM”, shall we?
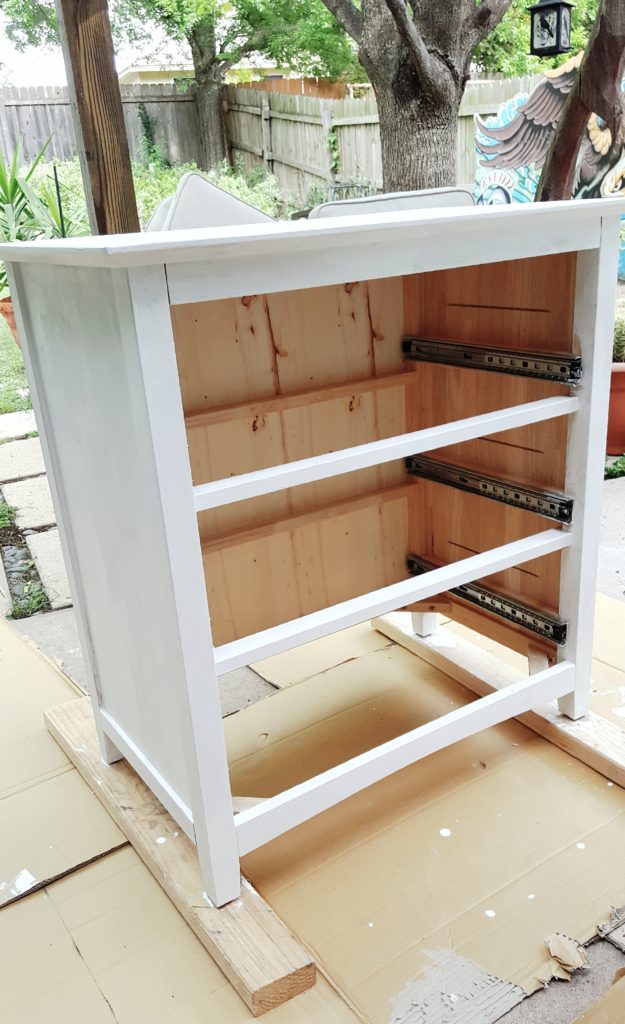
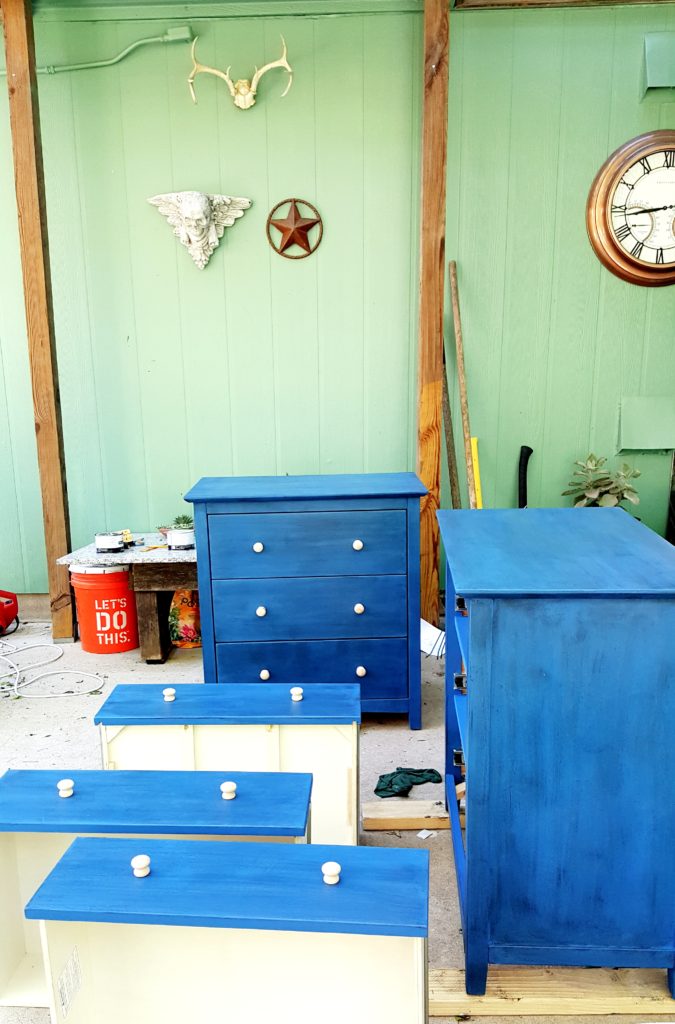
3-DRAWER CHESTS – They arrived earlier than expected!! YAY!!!


Wave of Calm:
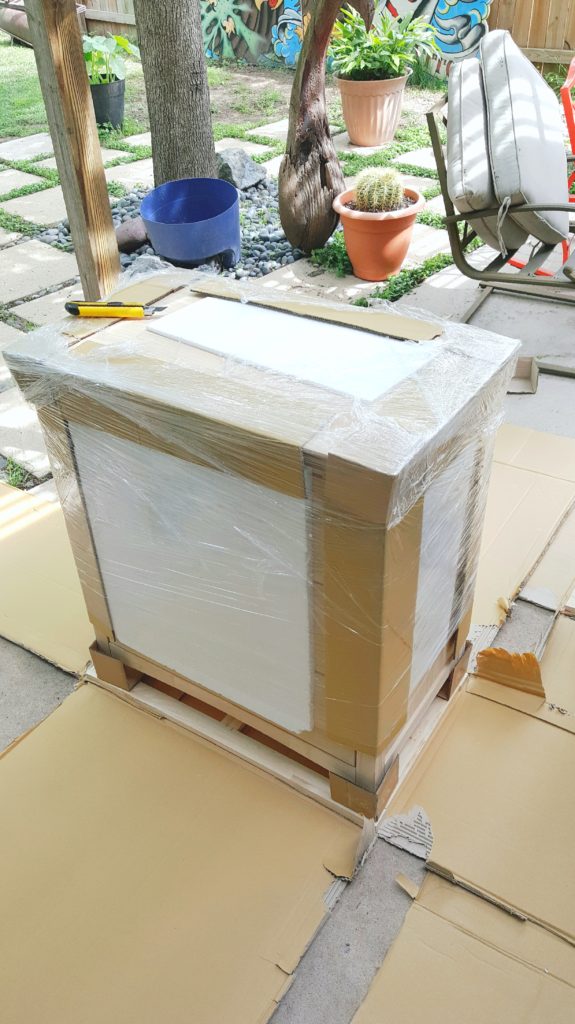
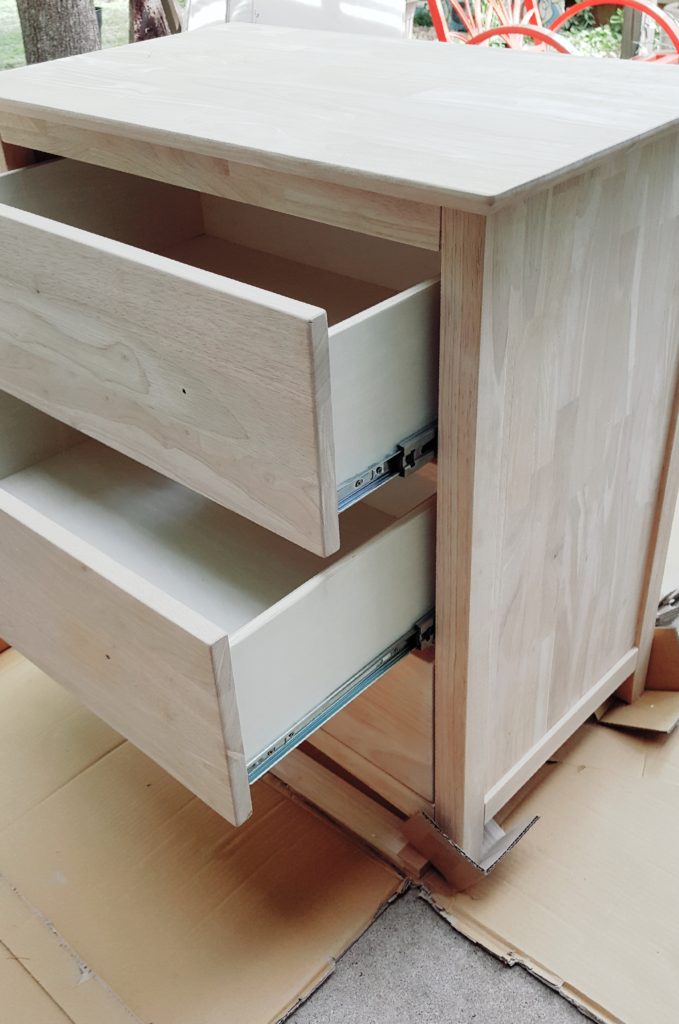
As you saw last week, finding the right size chest of drawers that could also serve as nightstands was a MAJOR challenge! In fact, hours and hours of searching online. But I succeeded and ordered a pair locally (seeing them in person really helped) from Furniture in the Raw, a pair of 3-drawer bedroom chests.
The 3-drawer chests not only arrived earlier than expected, but they’re perfect!
Picked them up last Thursday in my friend Kim Schlinke’s husband’s pick up. They were packaged incredibly well with corners protected and surrounded by padding. Therefore ZERO shipping damage and that’s a really good thing! Just like sponsor Furniture in the Raw promised, they are built of solid wood and quality construction. And the drawers glide beautifully!! I’m extremely pleased with my purchase!! Far more affordable than some ready-made ones and much higher quality.
YAY!! I made the right decision. Now onto unpacking them and painting them all in the same day!

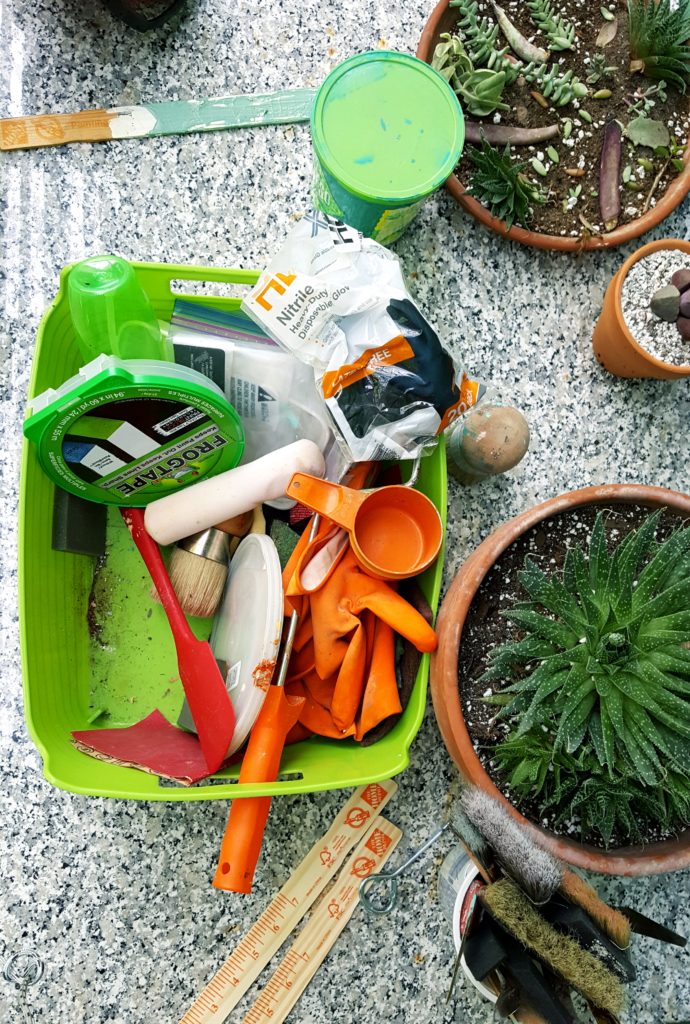
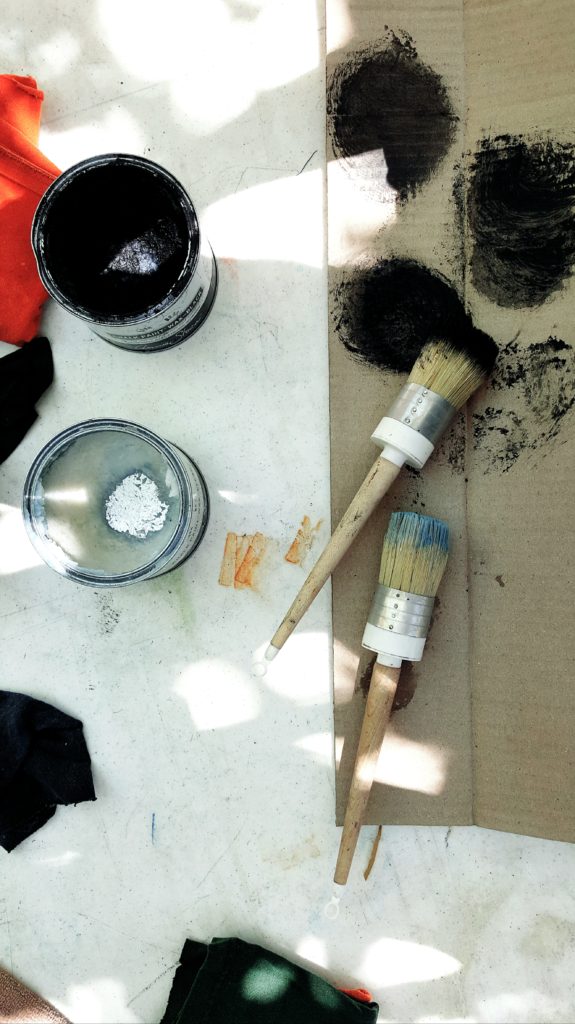
Here’s 10 steps I learned to paint and wax chests with chalk paint:
- Select the correct paint color & mix with spackle
- Add coat of primer
- Add 1st coat of paint
- Add 2nd coat of paint
- Sand
- Add clear wax
- Buff
- Add black wax
- Immediately buff, buff, and buff even harder (I literally thought my arms were going to fall off!) to get the look and finish you want.
- Wait a couple days until the wax really sets in then, brush the finish like shining up a shoe. (I still need to do this part this week.)
Tools of the trade for priming:
But WAIT!!!!
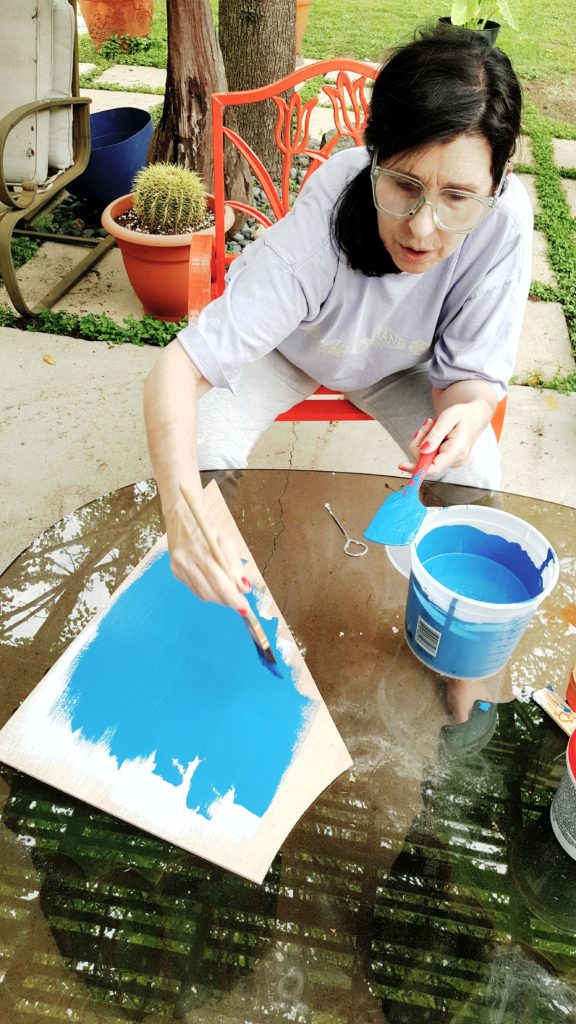
Wave of Panic: Oh no!!! It’s SO royal blue!! It’s SO bright! I must have selected the wrong blue! What am I going to do?

Selecting the paint color for the chests threw me into an absolute tizzy!!!
Picking paint colors is not my forte at all! This is where you have to have faith and trust in your team. After picking up the chests, Kim and I went to Home Depot and selected a blue paint, one of 2 blue tones in the wallpaper.
See that furrowed brow? Alarm bells are going off in my head screaming “Oh No! This is TOO ROYAL blue!!” I was really trying to not freak out and remain calm. Thankfully, my expert advisor and helper, Kim Schlinke, is a very stabilizing influence. Either that, or she’d have killed me by now!!
After picking up the chests and paint, we spent the rest of last Thursday afternoon mixing the color with spackle (below) to make our own chalk paint and testing it with different color waxes. (See “How to video” for proportions on my Instagram Stories HERE.)
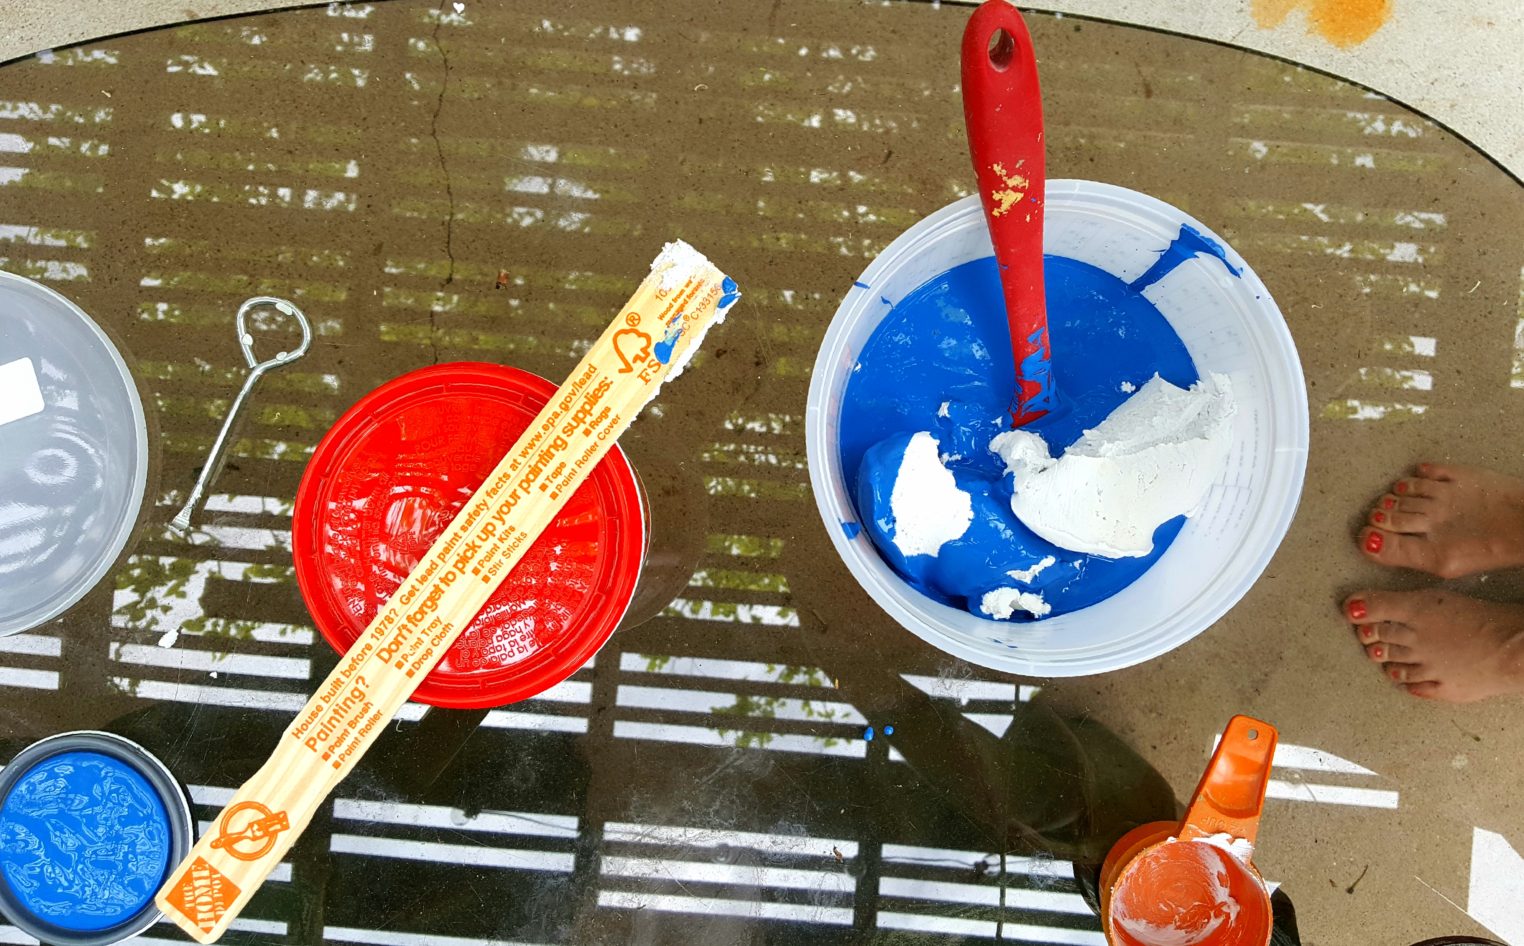
Kim was so incredibly patient with me. As she saw my panic level rise, she suggested we play around mixing in a little black into the paint and trying different color waxes, etc. But the darker blue looked like a Cape Cod blue which was just not going to work with the wallpaper as you will see below when I reveal it. (No fair skipping ahead!!)

And remember EVERYTHING has to work with the wallpaper and the luxury bedding!!
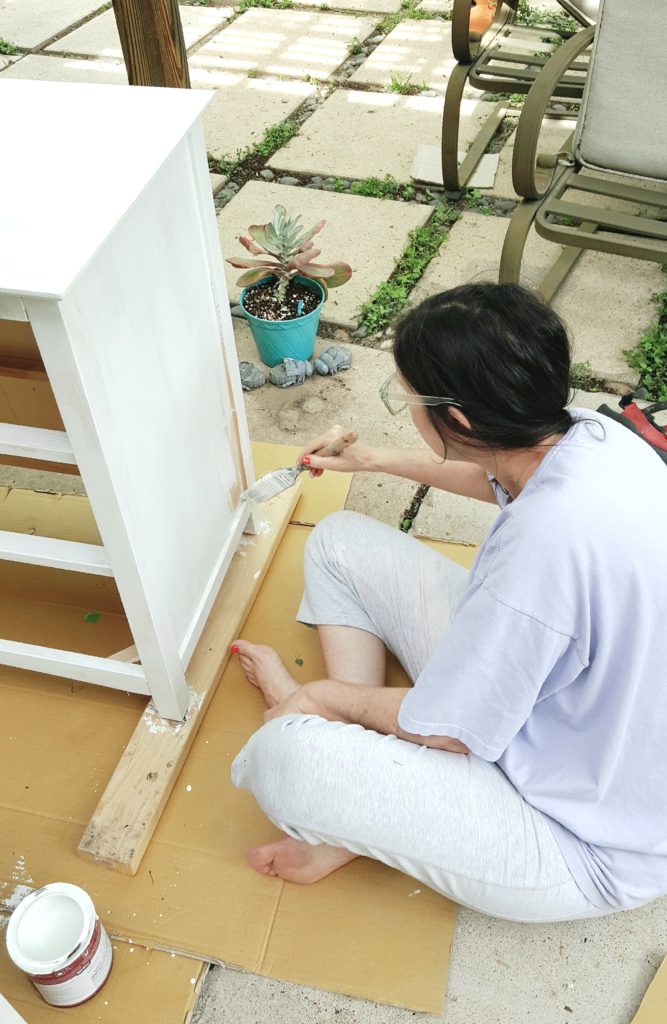
Now onto painting the chest of drawers.
Primer Stage: The wood was so smoothly sanded already, we skipped that step and went right onto sealing it with a coat of primer. See, I Look calm, right??
Voila!
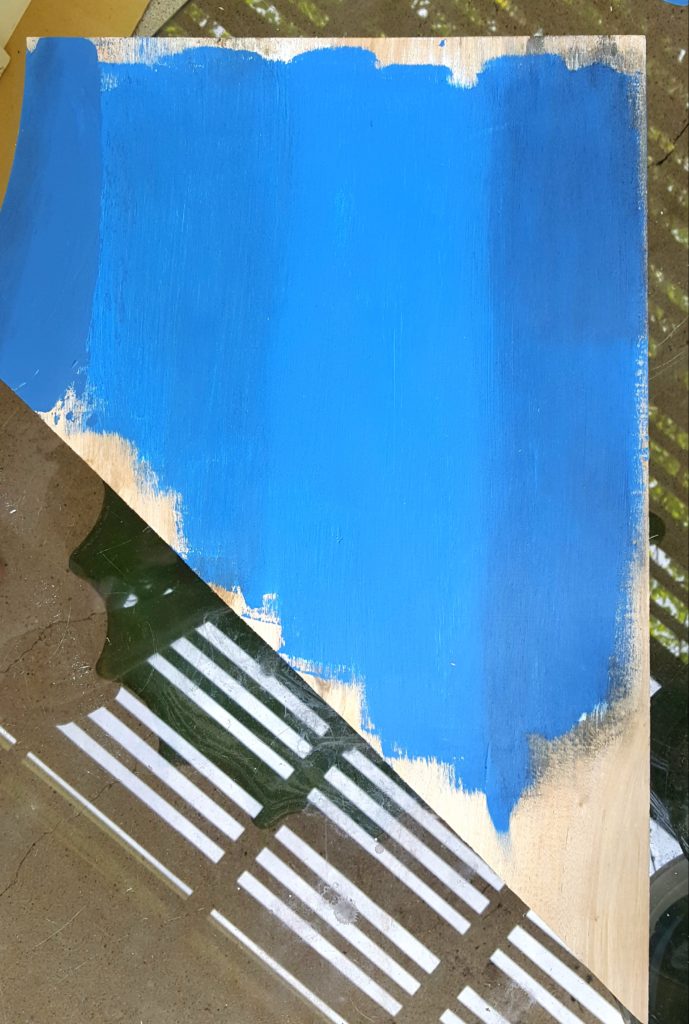
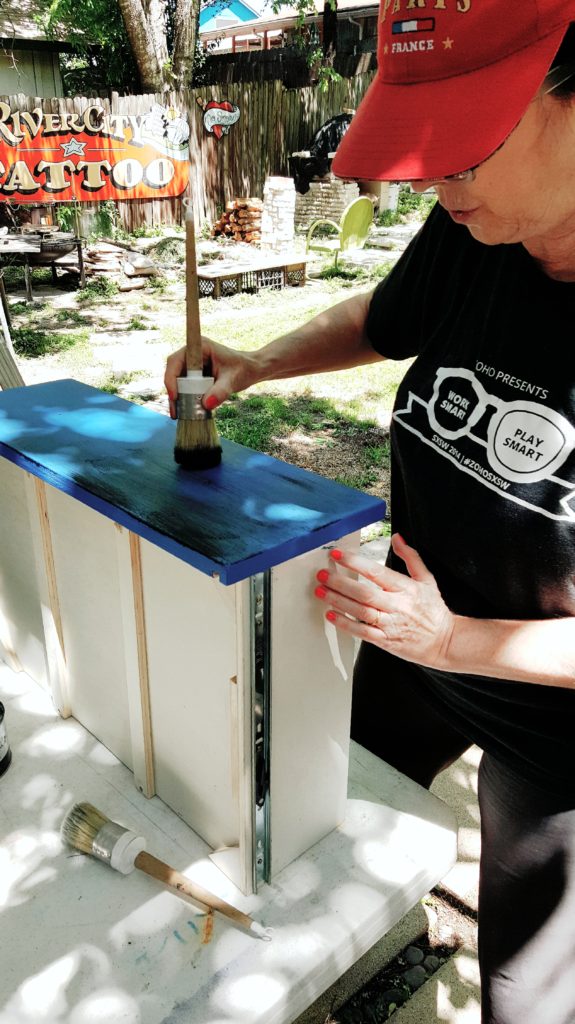
Painting Stage: This is THE stage I was most nervous about because I feared we selected the wrong color blue and I was going to have these NEON bright royal blue chest of drawers!! YIKES!! But I tried to remain calm while painting and not freak out that it was this incredibly BRIGHT!!
![]()
In the end, I had to trust Kim’s expertise and years of painting furniture. She said “You’ll see. Once you start applying the wax, the blue will get darker”.
So on Sunday (after my husbands and my 35th wedding anniversary dinner party, where the dessert was one if Kims Milk Bar Cakes….omg, to die for!!) I went back to her studio and worked two coats of wax into the blue wood. That is serious manual labor rubbing that in!! I thought my arms were going to fall off!
Sanding stage:

Tools of the trade for waxing:
Waxing Stage:
By this stage, we couldn’t really take many photos because it has to happen quickly. First one coat of clear wax. Then when you put on the black wax, you have to move fast to to the buff stage (as that’s where your artistry comes in) or you’ll have big globs of black wax. It dries very quickly and the buffing moves it around and creates darker and lighter areas. Phew!! That was stressful, but I enjoyed that part.
Sure enough, Kim was right, it was darkenng up as I stood there working on the other chest. It was fascinating to watch! See the difference? Waxed chest is on left, and it’s even darker now, several days later. (NEW drawer knobs are coming.)
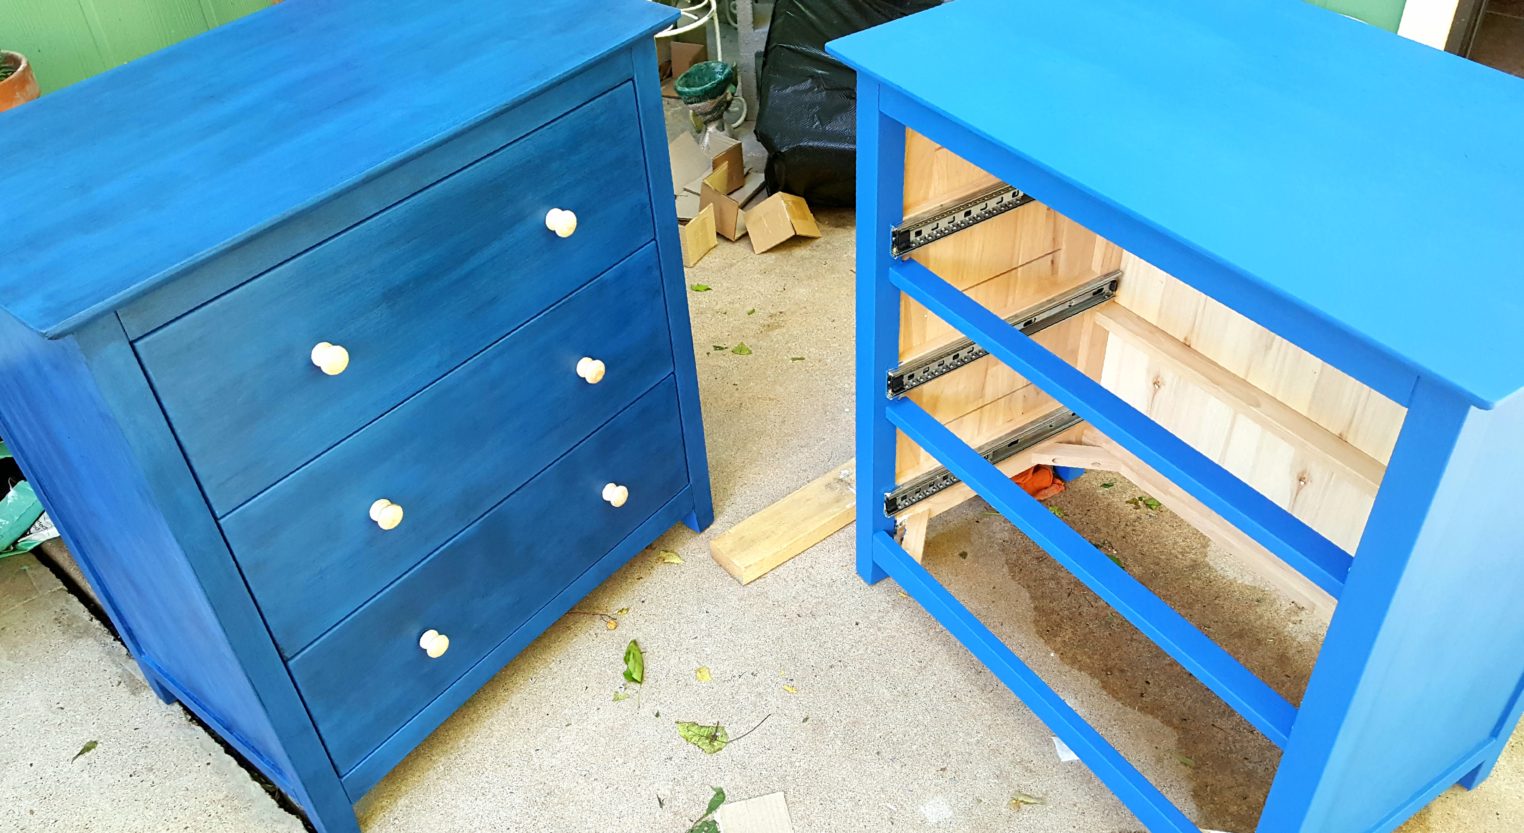
Important to note here: I am NOT a DYI-er and have never painted furniture. Kim was a saint!! Patiently walking me through the process but letting me do the waxing. (I discovered I’m better at waxing than painting ….who knew??)
Didn’t they turn out beautifully?
TEXTILES
Wave of Calm:
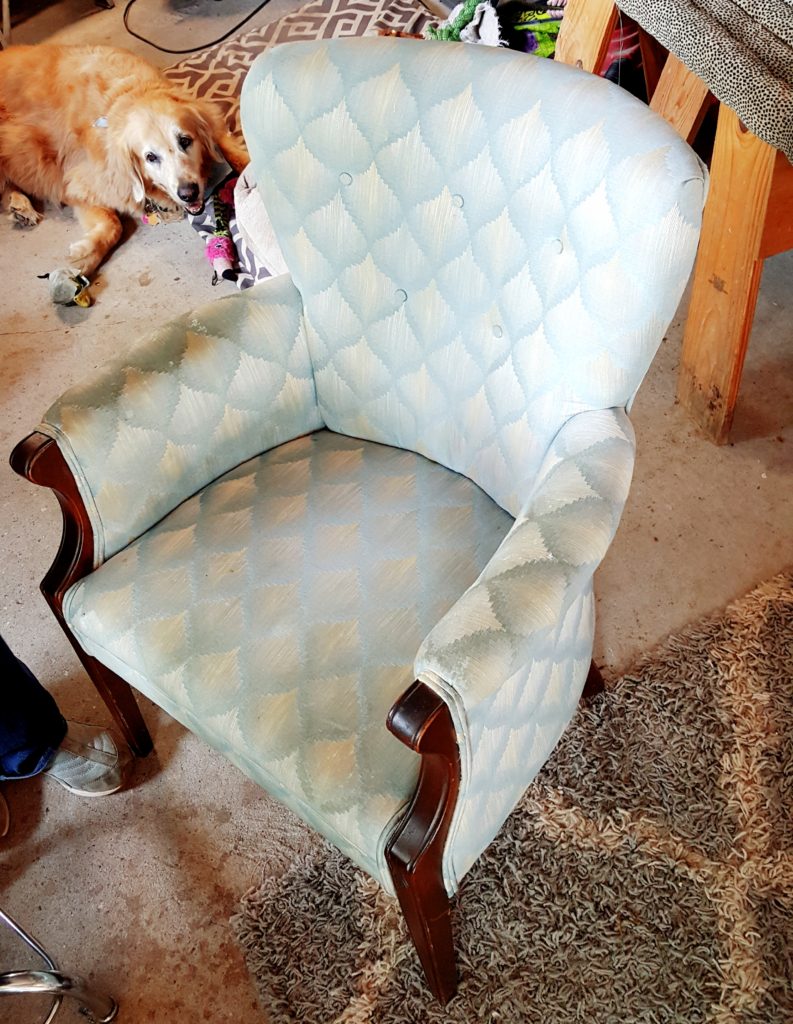
While I’m still waiting on a couple things like the bedding and lamp shades so I can select the window seat fabric, I DID select ONE textile for the cushion chair and delivered it to the upholsterer.
I met with Dana at Accent Upholstery first to discuss the fabric and yardage needed. I love to support small businesses and have worked with Dana for years. It’s so generous of her to squeeze in my project with her schedule and at a discount. It’s very comforting to have built relationships with local, experienced artisans that you can trust, like Kim and Dana.
Dana agreed, it’s going to look fabulous on this petite antique chair that was my husband’s mother’s. (In fact, years ago, I helped her select the fabric that’s on there now.)
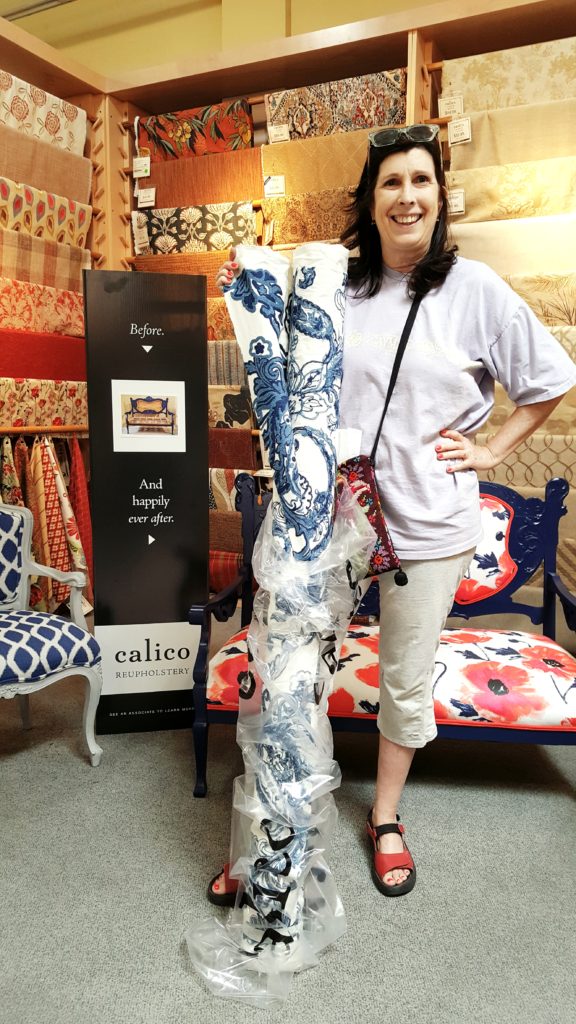
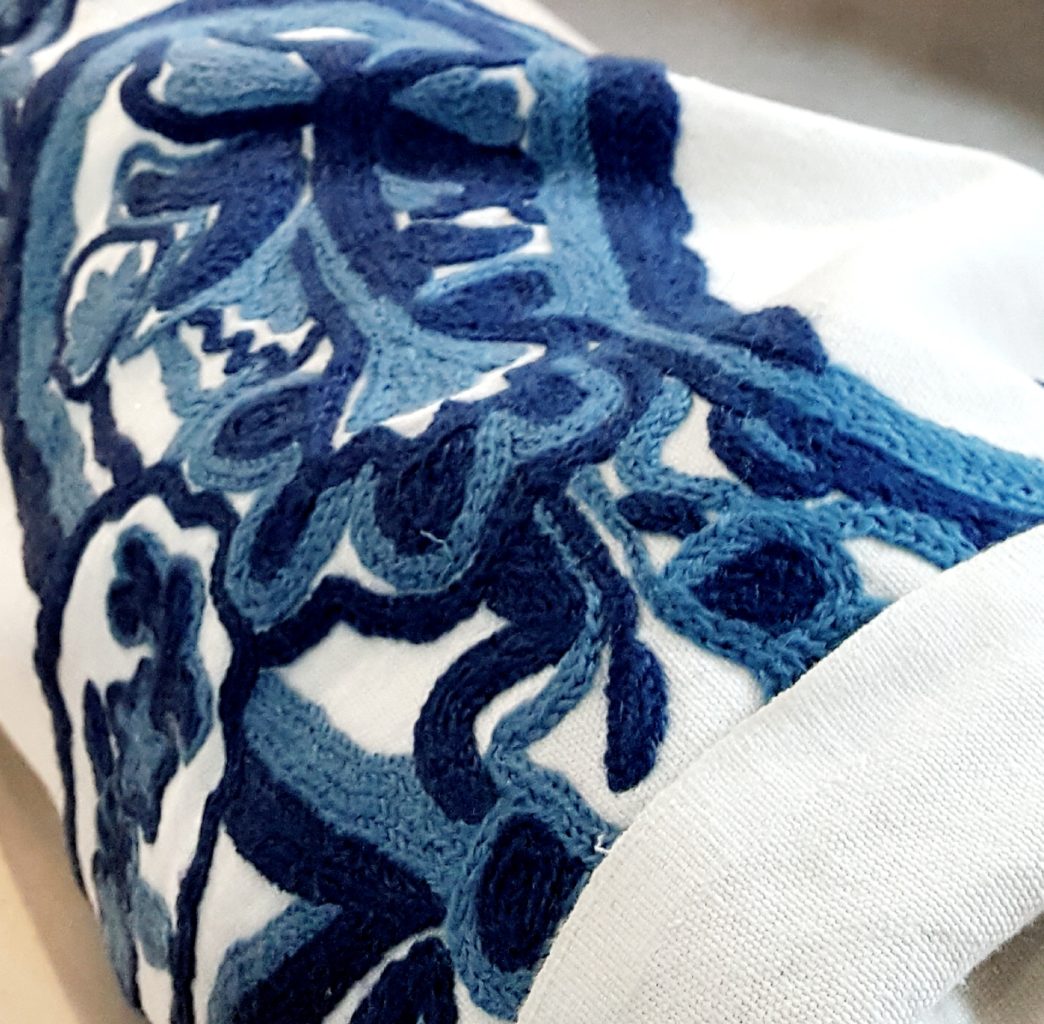
Here I am at Calico Corner with fabric that was $125/yard, but I caught it on a sale. I LOVE this Kashmir crewel!! The blues in it are perfect and go with all the shades of blue and white that will be in the BOLD BLUE BEDROOM and the texture is yummy!
Wave of Panic: By Friday, Peacock Alley, a major sponsor, had still not received the wallpaper sample from me, so no news on bedding yet. It’s not their fault, it’s the U.S. Postal Service who seems to be unable to deliver TWO samples to Dallas. Crazy!!
I cannot select the the window seat, shade and valance textiles until I see the pattern for the bedding. They must all work together AND with the wallpaper. I was only able to select the crewel because it worked with the wallpaper and is in a different part of the room.
Sourcing fabric has been the 2nd biggest challenge so far; the first finding the right size chest of drawers.
As a pillow designer I can see all the textiles I’m working with and can try this and that BEFORE my design comes together. I can experiment at no cost. I call it “playing with my fabrics and trims”. It’s the creative process I go through to come up with my design.
With designing an entire room, and NOT having the textiles in my studio, it’s a whole different ball game.
I’ve had to rely on my own visual instincts and colors on my phone and PC. My fear is that I’m wrong and nothing I’ve visualized will go together. I don’t really think that’s true, but let’s pray anyways that it all works!

SAVED ON MONDAY MORNING – BEST BIRTHDAY PRESENT EVER!!!
Wave of Calm: On my birthday, I received a text from Peacock Alley that they had received the wallpaper sample and the bedding coordinated beautifully!! Hallalujah!!!! What an amazing relief!
Now I could move forward with the final selection of the fabric for the Roman shades and valance, as I knew the bedding would arrive shortly, and I at least had a photo. (Nope, you’re gonna have to wait till next week to see it, but it is G-O-R-G-E-O-U-S!!)
Wave of Panic: What textile will I source for the shades and valance? What if I can’t find the right ones to coordinate with the Peacock Alley bedding and the wallpaper??
Wave of Calm: Now that the chests are painted and in the room (I can’t wait for you to see them on the BIG REVEAL Thursday May 9th!) I can now focus on accessorizing and styling the bedroom in accents of gold and white which I think will help the room pop.
Wave of Panic: But I’m not a stylist! What if I choose a mirror that’s not the right shape or can’t find lamps?
Yadayadayada…..I wanted you to see in this post, that this is how the process has been going for me, in my head, most every day. Back and forth, back and forth. I truly appreciate all an interior designer goes through to create such flawless, beautiful designs for their clients.
My job this next week, WEEK 4, is simple, but incredibly complex too. Mainly because there are 3 textiles I still need to source. This part has been stressful looking at hundreds of tiny swatches of fabric online for days on end into the wee hours of the morning.
Here’s what’s left to do:
- I must find THE perfect fabric for the window seat shades, valance, and cushion. The shades of the blue and white are important details I have to factor in when sourcing my final 3 textiles. Certain blues lean one way. And cream really doesn’t work with the crisp blue and white look I’m after. This is a BIG challenge still!
- I must think through and start looking for accessories like a throw, a tray, a blue and white planter, and more.
- I must source the perfect pair of table reading lamps to go on top of the new blue chests that also serve as our nightstands.
- I’d like to find pretty blue and white desk accessories and perhaps a tiny cocktail table to go by the window seat.
- I need to order two white, super soft rugs, as my designer convinced me one big rug will not work in such a tiny room. Although I must confess, that if a rug sponsor came through, I still would like to try an 8 x 10 rug.
- I need wall art OMG, I have completely forgotten about the walls!! I think I’m going to put out a message on Facebook, as I have a lot of artist and designer friends, to see if anyone would like their work featured above the bed. It’s a great large space, like 30″ x 30″.
- Am I forgetting anything???
I’m thrilled the hard labor part is over, hanging the wallpaper and painting the chest of drawers, And I am forever grateful to my dear friend Kim Schlinke who patiently taught me how to do both. But that doesn’t mean the stress is over. I’m still majorly stressing about selecting the best 3 textiles for the focal point of the bedroom, the window seat area. And I am a tad intimidated about styling the room.
But that’s what’s so exciting about being a Guest Participant in the One Room Challenge. You are challenging yourself, your creativity, and your skill set to transform a room in just 6 weeks. It really IS a challenge on so many different levels. And for me, it’s pushed me way out of my comfort zone as a luxury pillow designer, which although difficult at times, is essential for growth as an artist and entrepreneur.
Thank you so much for following along. Please subscribe to our blog, Follow me and One Room Challenge on Instagram and all the other Featured Designers and Guest Participants right HERE. You can also follow hashtags #oneroomchallenge and #BHGORC so you don’t miss a single post.
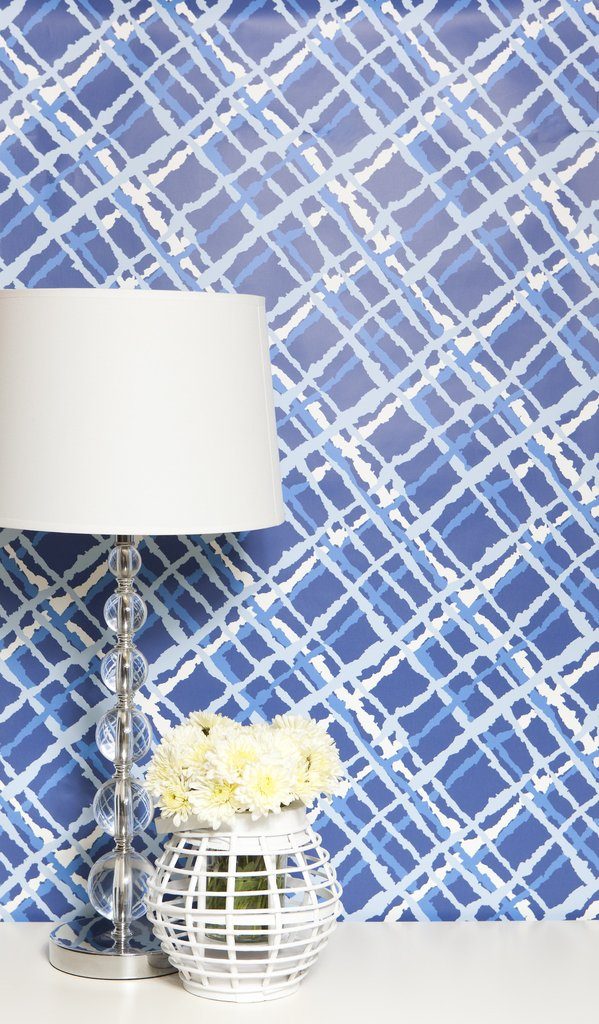
A big thank you to all the sponsors supporting my efforts here to transform a simple small bedroom into the Bold Blue Bedroom. And below is why this bedroom project is called the “BOLD BLUE BEDROOM”. You guessed it, the wallpaper!!!
You see, my floral on floral vision for the bedroom is only part of the room, because my wallpaper sponsor is the talented Brooklyn designer Kimberly Lewis. And here is the wallpaper I’m using, the Beverley, a ruffled trellis pattern, but she calls it a “watercolor plaid”. It is inspired from the vintage dresses that women wore in the 1940’s. I remember my Great Aunt wearing some like this. Stay tuned for more details on the wallpaper story next week with lots of photos!
Deborah Main Designs studio is celebrating 15 years in business, and I am very grateful to the One Room Challenge and Better Homes & Gardens for this wonderful learning opportunity. Thank you!
I’m happy to report that despite my moments of sheer panic, I think it is coming together. Next week, WEEK 4, tune in as I share much more of how the room is shaping up and the textiles I’ve selected. And you’ll get to see the Peacock Alley bedding!! I can’t wait!! And then it’s onto where I shine best, creating and layering in the color and texture with Deborah Main luxury decorative pillows. I’m The Pillow Goddess afterall, so that’s going to be the icing on the cake for me, and I hope for you too! Till next Thursday, XO PG
Special Note: I want to thank the full (and partial) sponsors of the BOLD BLUE BEDROOM for the One Room Challenge: Peacock Alley luxury bedding, Kimberly Lewis Wallpaper, the Lampshade Lady, Furniture in the Raw, and Accent Upholstery. I am so grateful for your support! All photography and opinions are my own, except logos and last image by wallpaper designer Kimberley Lewis.
Michelle
Posted at 12:58h, 19 AprilThe furniture looks great! I really dislike painting furniture for some reason. I think it’s tedious and I like the progress of building something or renovating something much better. It’s a necessary thing, though!
Things are really coming along with your room – looking forward to next week!
Deborah Main
Posted at 01:38h, 20 AprilThanks so much Michelle! I hear you. That was my 1st time painting furniture. Wasnt that good at it, but I did like the waxing part. My friend is a total expert and loves painting furniture and redoing mirrors etc. So I learned something new.
I hopped over to your blog and now I understand why you dont like painting. Your a builder and make awesome furniture. I’m in total awe!!
Can’t wait to see how your project turns out. Thx so much for stopping by my blog. ❤
Janet Lorusso
Posted at 23:50h, 20 AprilIt’s going to be beeeeaaaauuuuutiful! Painting and waxing furniture is SO MUCH WORK – I think I would have lost all will to live trying to do all that?! What a great resource for unfinished furniture, though, and they look fab in your blue finish!
I adore that blue and white crewel you are using on the chair and Peacock Alley is my favorite bedding so I’m looking forward to seeing that!
Deborah Main
Posted at 04:38h, 24 AprilAw, thank you so much Janet!! You can’t imagine how much your comments mean to me. I’ve hit the WEEK 4 wall and my photographer comes Monday. I am NOWHERE NEAR DONE!!!
But it’s nice to hear the things you are looking forward to seeing. I’ve definitely learned a lot from my seamstress and dear friend Kim, who seems to know a little of everything. I’ve never been a DYI-er so it’s nice to know I can paint furniture AND hang wallpaper. Oh the things you learn doing the One Room Challenge!!!
Thx for taking time to comment. I truly appreciate your support!! xo 💙
Andrea Van Hoven
Posted at 01:47h, 21 AprilIThe wallpaper is so bold. Great foil for all he floral. Can’t wait to see it all come together.
Deborah Main
Posted at 04:39h, 24 AprilYou are not kidding!!! The florals work beautifully with it. Can’t wait for you to see!! Thx for stopping by the blog my friend. 💙
Lisa Peck
Posted at 15:49h, 21 AprilLooks like everything is coming together so well! I admire your chutzpah in taking on the painting project despite your lack of experience! I will enjoy seeing the progress!
Deborah Main
Posted at 04:41h, 24 AprilThank you Lisa! I’m not sure about Chutzpah, more like C-R-A-Z-Y….lol!! But sweet of you to say. Actually doing everything for the room is a new learning experience for me, as I only know how to design pillows…lol. Thank you for following along and commenting. Really appreciate your support! 💙
Jill Laine
Posted at 19:27h, 21 AprilWow Deborah, you are DEDICATED! This painting furniture task is not for the easily distracted, or those lacking focus. Looks really great and I can’t wait to see the final product!
Deborah Main
Posted at 04:44h, 24 AprilThanks so much Jill!! I wouldn’t have done it without my friend Kim teaching me. She’s a pro and LOVES to do it. I think I flunked painting but did pretty well on the waxing. Thx so much for your support!! 💙
Leslie Carothers
Posted at 19:51h, 21 AprilEverything looks like it’s coming out perfectly, Deb, despite the doubts you’ve had to face.
It’s been a fun journey following your progress and I look forward to each installment.
Happy Sunday!
Deborah Main
Posted at 04:46h, 24 AprilThank you Leslie!! It certainly has been quite the learning experience. And I still have my doubts if it will all look good together. Mixing patterns is not my forte but I’m trying. Thank you for following along. I truly appreciate your support!! xo 💛
Delia Gibbs
Posted at 00:25h, 22 AprilWow! It looks lovely for the first time. I was laughing so hard because I was here admiring your orange chair thinking it was part of the makeover 🙂 Best of luck finishing. We have only 3 more weeks to go.
Deborah Main
Posted at 04:51h, 24 AprilLOL Della about the orange chair!!! I love orange and blue together but alas, my room is blue and white. I think that orange chair has got me CRAVING color!!!
I don’t know about you, but I got the #week4wall this week. Thankfully things are looking up. But my photo shoot is MONDAY!! Yikes!!
Thank you for stopping by the blog and good luck on finishing up too. I’m gonna hop on over now to see your room now. 💙
NICOLE DELACRUZ
Posted at 09:30h, 24 AprilThis is coming out AMAZING!!! I can’t wait for the final reveal and especially LOVED seeing your process of how you painted the dressers. Great job!!!! xoNicole
Deborah Main
Posted at 02:04h, 25 AprilAw,that’s so sweet of you to say Nicole. Thank you!! Glad you liked seeing the painting/waxing process. I was hoping my readers would enjoy that.
Thanks so much for stopping by the blog
Really appreciate the feedback and your support. Can’t wait to see yours too! xo 💙
Leslie Wood
Posted at 15:16h, 27 AprilEverything looks like it is coming together nicely. Love that you show all the elbow grease you are putting into the project. It really shows what it takes to put a room together! I can’t wait to see the finished project!
Deborah Main
Posted at 06:20h, 30 AprilThank you so much Leslie!! I have always greatly valued and respected the expertise of interior designers. But after participating in ORC, my admiration and awe has risen to new heights!! I have NO idea how y’all do what you do!?!? Seriously!! This is just one room and I feel whooped! Praying it all comes together. Doesn’t help I twisted my ankle…:(
Thx so much for stopping by the blog and for your support. For sure there IS plenty of blood,sweat and tears in this one room challenge! 💙
Deborah Main
Posted at 04:09h, 04 MayThank you Leslie for stopping by my blog and my apologies for such a tardy reply (had tech issues, but all fixed now).
There has definitely been a lot of elbow grease and learning on the job for sure! I can’t believe all it takes to put one room together. I already have incredible respect for you and all my interior designer friends, but I have an even deeper admiration at all you do to make your clients homes beautiful. You are rockstars in my book!!
Thanks so much for your support Leslie. I eager to hear your feedback on the final result, as this is the 1st room I’ve ever designed top to bottom with a complete vision and a deadline. Only one more week till the BIG REVEAL! 💙