

18 Dec 8 Holiday Styling Tips for Post-Op Sanity!
 Laid up for the holidays from surgery or a bad cold? I’ve got you covered. But first off, Happy Holidays! A week from today is Christmas and two weeks from today is New Year’s Day. Many families are working hard to prepare. Either for relatives to visit (maybe fixing up the guest room) or for children to be surprised by what’s under the tree from Santa (finishing that shopping list) or a bountiful meal, travel, or all of the above. Being Empty Nesters now, our holidays are getting quieter and quieter, and this is the first Christmas we are not decorating our tree. But we DO have one, and my husband and I have been enjoying cozy fires and a little binge watching. And we’re really looking forward to our son from Brooklyn coming home for a few days.

If you’ve been following the blog, you know I had major surgery about 6 weeks ago. The GREAT NEWS is they got all the cancer and I don’t need chemo. YAY for prayers being answered and those “kick cancer” golden boots!! (See bog post HERE.) I’ve got some serious celebrating to do and more Chandelier Diary Dinner Parties to plan, but I’m still not well enough to celebrate quite yet.
The not so great news is recovery takes much more time than you think. It’s been 6 weeks of recovery, and my energy pooped out at about week five. So I think I have a few more weeks ahead of me. My sister had surgery and said her energy didn’t fully come back for 6 months! Oh no!!! I pray mine comes back waaaay sooner than that or I’ll go insane!!
What I’ve learned during my recovery time at home and “mostly” unplugged, is that many people opt for surgery during the holidays. It’s a time when people are so busy, that, if you can clear your calender (which I did just in time before surgery), the holidays are the best months to take the time you need to fully recover.
Now, I didn’t say it was fun or easy. In fact, I’ve had a couple minor meltdowns at the frustration of not being able to decorate, meet up with friends, entertain, or go out and enjoy the holidays. But I DID make a darn good Challah French toast yesterday! Yum!!

I confess I was a bit naive going into this. I felt so great at week 4 with the news of NO CHEMO, that I foolishly thought, I’ve got this, my recovery is almost over. Ha! Ha! Ha! Not. It varies from person to person, and my body is telling me I definitely need way more time to rest and do nothing.
So I’ve been hanging out on Instagram a lot; please follow along. I like pretty pictures as much as the next person. Great design and beautiful photography draw me in every single time. So it was no surprise (since Thanksgiving came and went and I had no decorations up) that I was instantly drawn to this stunning design below by an incredibly talented London artist Lucinda Wharton.
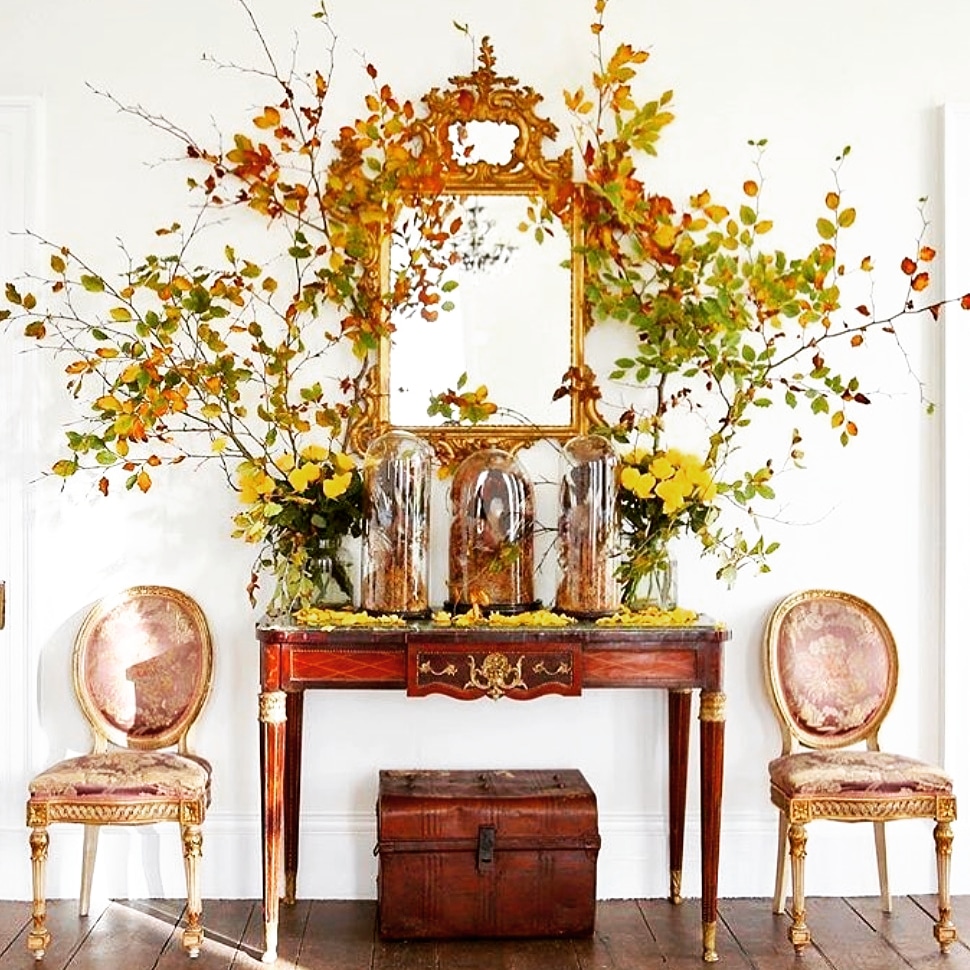
Design and photography by Lucinda Wharton.
Since surgery I’ve read, watched movies, slept, read, watch movies, and slept. Repeat. That’s not totally true, as I’ve worked a little. But I quickly realized it was too soon to start working. (This blog doesn’t count, as I need a diversion right now, thank you. 😊)
I discovered this stunning, classical design (above), by Lucinda Wharton, on Instagram. It was just the inspiration I needed for my Fall Foyer styling project.
One sunny Monday (I think exactly at week 4) a burst of creative energy followed. Since Thanksgiving had passed, yet all the fall colors were still in full bloom, it was gorgeous weather and I decided to style our front foyer. Because frankly it left much to be desired.
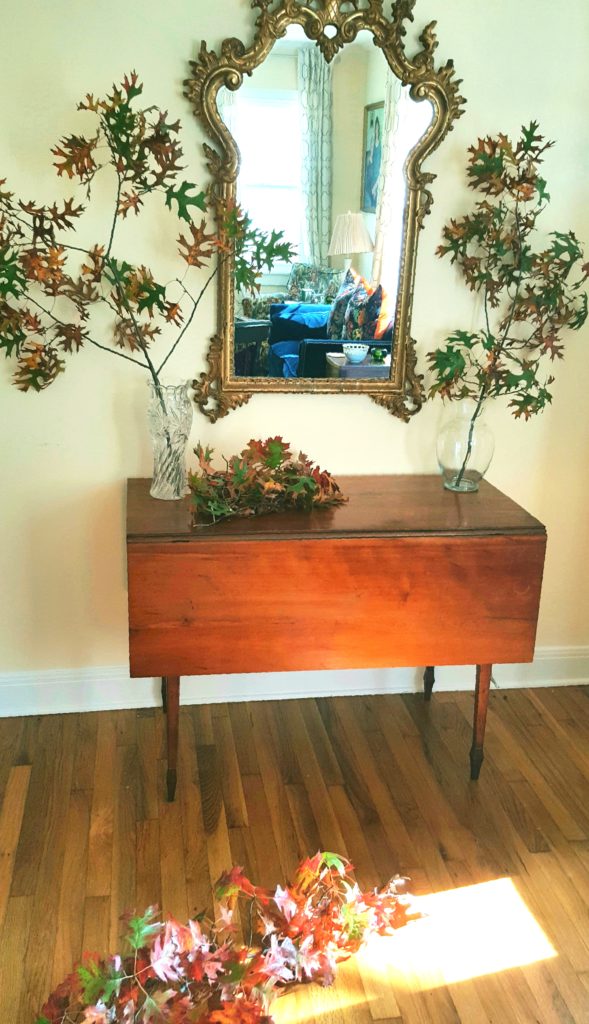
This is the perfect set up below, right? A vintage gilded gold mirror over an antique Shaker drop leaf table that looked absolutely boring, except for the almost dead planted gifted to me after surgery. (I managed to keep a lot of flowers sent to me alive for almost 4 weeks! They were all gorgeous!) But alas, this front entry needed a boost.

Only problem was I wasn’t driving yet. I was in a 4-week-celebratory-mood and my husband was clearly not. So needless to say, he was none too thrilled to drive around the doctors parking lot to stop at trees and snip branches of pretty fall leaves. But when creativity strikes, you know its hard to dampen the enthusiasm. (Although I give my husband major points for trying to ruin my plan.)
But in the end, to his credit, he was very sweet, stopping at 5 different trees. I thought for sure security would be out any minute saying “Excuse me M’am, but what are you doing with that weapon, those huge branch clippers in St. Davids Hospital parking lot?” I figured they thought I might be there to smash car windows!

But we made it home without me getting arrested. And David even stopped so I could put a note on a neighbor’s door asking if I could clip some of her gorgeous winter berry branches. (Planning ahead for my Christmas styling project next.)
So let me share with you my styling process. Note: I am not an interior designer and styling anything is a challenge for me. But I’m learning.
My Fall Foyer styling project commensed with the colorful branches my husband so kindly clipped. He said during the process, “This reminds me of that crazy time when you had me stop on the country road to cut down mistletoe. You actually wanted to start a mistletoe business!” (Ha! Little did we know a budding entrepreneur was behind that mistle toe side trip.)

I placed two clear large vases at either end of the table and started to fill them up with colorful leaves I had strewn about on our front porch. (By the way, the antique, drop-leaf Shaker table was given to my parents on their wedding and then passed down to my husband and I on our wedding day. We used it as our first dining table. And I’ve always wanted a gilded mirror and finally snagged this vintage one a few years ago.)
Once I started, I thought, Oh no, is this going to really work?? It was looking rather sparse and remember my styling skills are minimal. I was hoping I got enough branches cause all the beautiful golden yellow leaves on the trees at our neighbor’s house below had already fallen off.

But by patiently adding layers of leaf branches, it eventually filled out. Phew! Cause there was no way I was going to get my husband to go clip the berry branches, and anyways, my energy was fading and I still needed to get a call from the homeowner to get permission. (A nice woman called later and gave me permission, but I have yet to muster the energy or inspiration for the Christmas Foyer Project).

Now where was I going to get some contrast with greenery? Aha! The huge bay leaf plant in our front yard which had grown real tall after all the rain we had.

One thing I really wanted to do was use all natural elements and not have to ask my husband to take me to a store. I wanted to only use what I had on hand, so the bay leaves really did the trick.
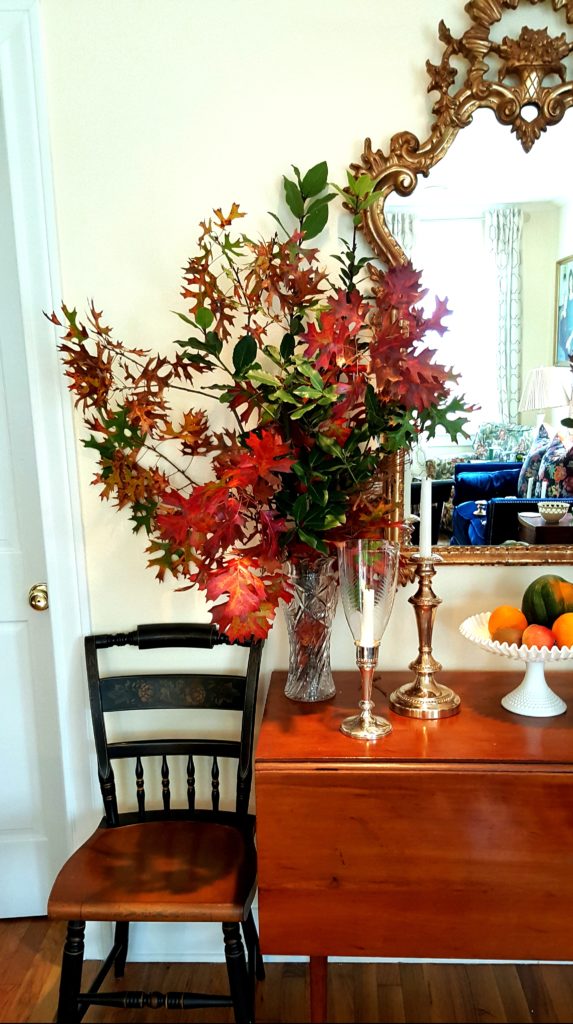
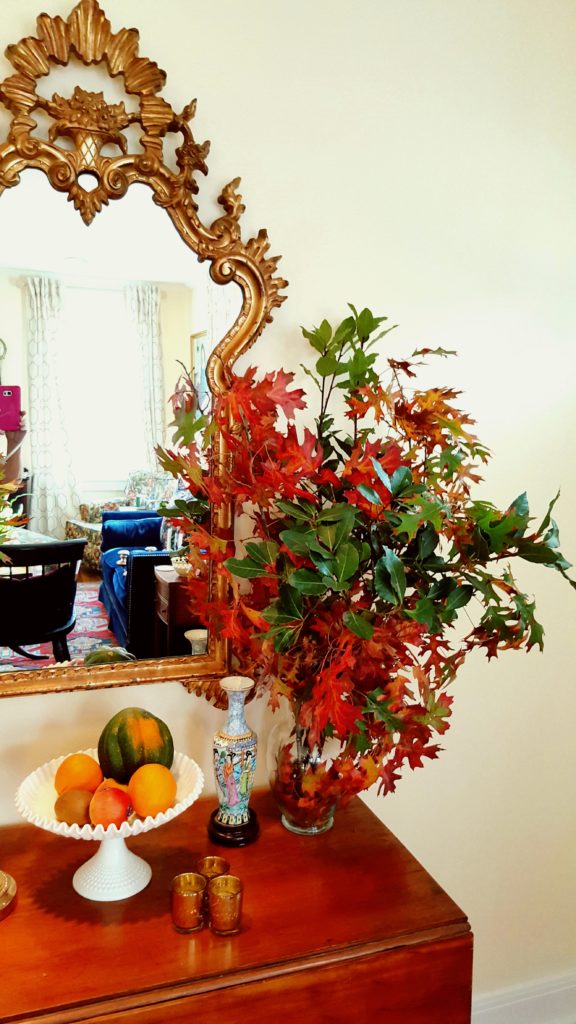
Then I had to think really hard about what display items I had around our home that would make for an interesting vignette. I found some fruit lying around in a vintage white milk glass fruit stand, and a lovely Chinese vase we collected on our trip to China. I thought the white added some fresh contrasting color, and the white in the vase picked up that color. I added a couple vintage hurricane lamps I recently inherited, and one of the umpteen antique chairs we seem to have around the house, and…
Voila, it worked!
![]()
Below are the left and right views so you can see a little more detail. Frankly , I wasn’t sure it was going to look any good at all. But I was pleased with the results. My effort paid off, and I had SO much fun for those two hours of energy on a gorgeous sunny day. It was the first creative thing I did since surgery.
Okay, on to the Christmas Foyer project. Sadly, the berries have not been clipped. Remember, this Fall Foyer project came AFTER Thanksgiving. It”s still sitting there and all the leaves have turned brown. So I imagine maybe in a couple weeks I’ll be up to doing the red berry styling.
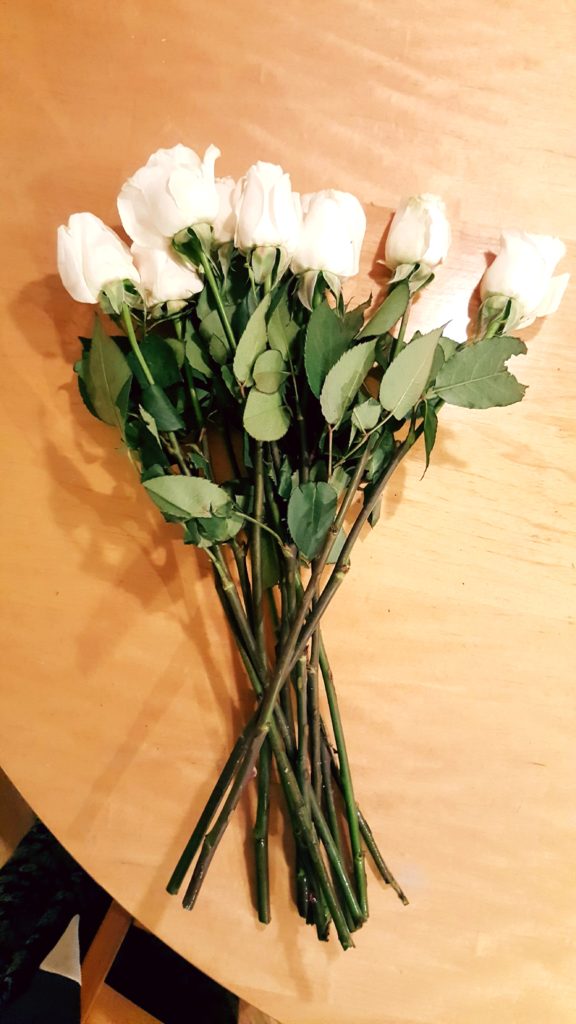
But, for now, I was able to do one more creative styling project, a holiday floral arrangement. My husband so kindly, per my request, bought a dozen red and dozen white roses at Trader Joes. By the way, great prices on flowers at TG’s!!
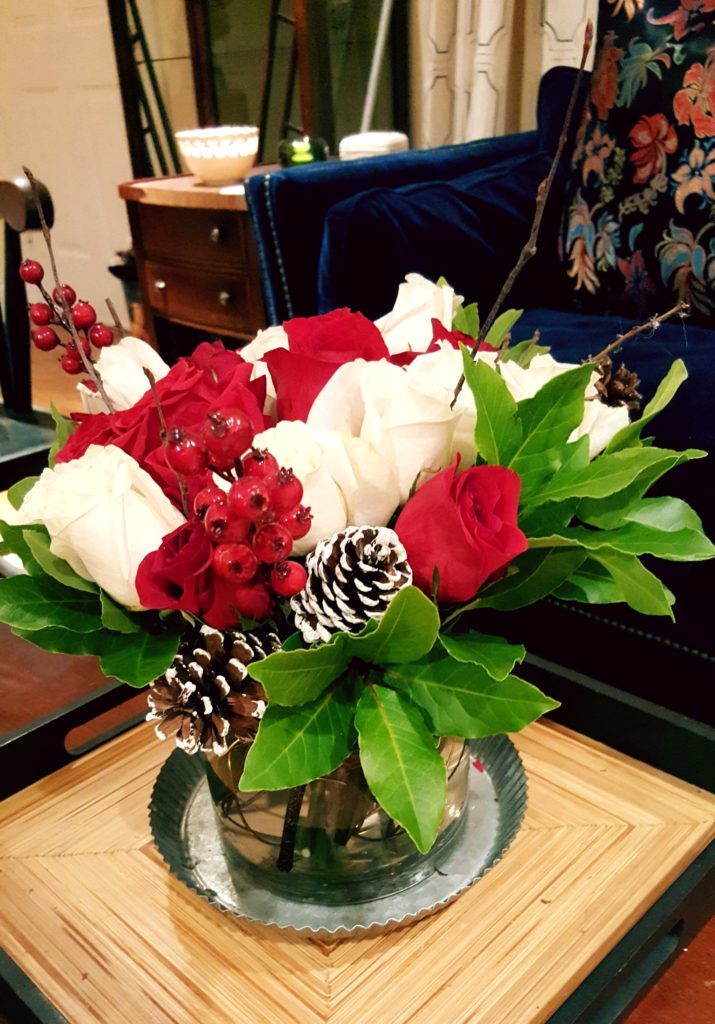
The backstory to this next styling project that has helped keep my sanity, is that my dear friend (and fab photographer) Vickie Flaugher surprised me last year with a gorgeous holiday floral arrangement that actually went with our cranberry cocktail for our holiday party. Oh, it was SO much fun!!! And yes, I missed having one this year. But here, below, is a festive photo of the gorgeous floral arrangement last year.

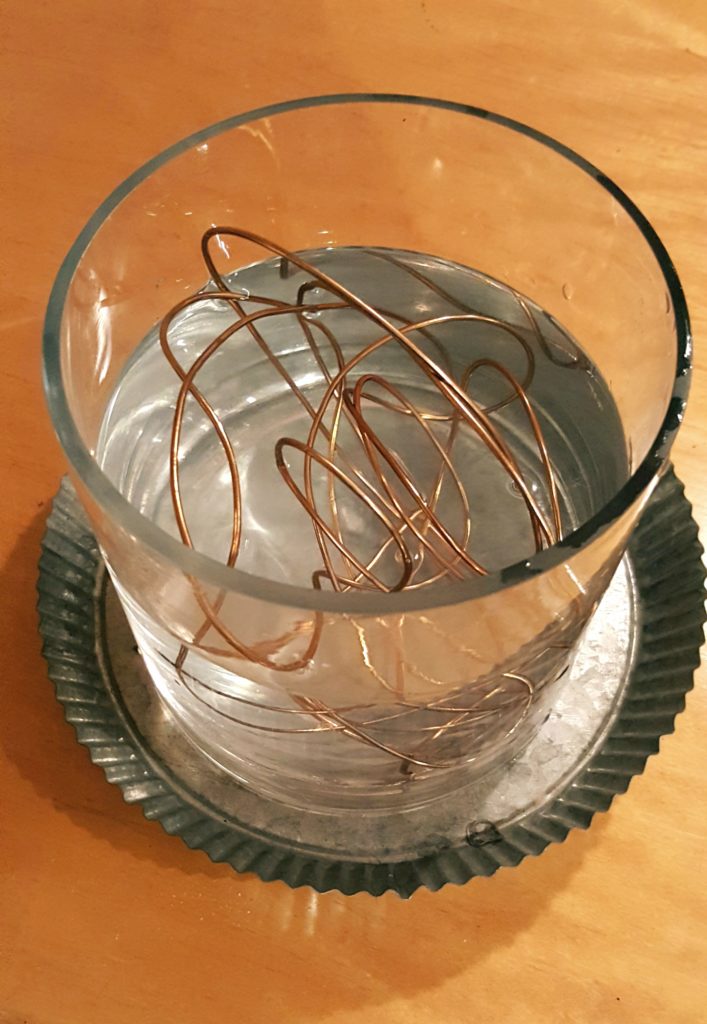
I’m so glad I decided to hang onto the vase, wiring, and pine cone decor so I could maybe re-create a similar floral design this year. Good thing I did because it was the perfect antidote to not being able to go clip the berries or decorate for Christmas yet.
Now onto my 8 Holiday Styling Tips to Keep You Sane (if your kind of homebound during the holidays). Note: these styling projects may be very elementary to some, but when your energy is limited the simplest creative project can provide immense joy.
1. Decide what area you’d like to style. It could be your fireplace mantel, or like we did last year, our piano. This year I chose our entryway/foyer because it really needed a boost. Either purchase some roses or, in the case of my Fall Foyer styling project (above), clip some colorful leaf branches with the help of your husband or a friend.

2. Find a clear vase to use. I think clear vases add another dimension to styling, as the color and texture of branches or stems is more visible. You can even put rocks or colored glass in the bottom of your vase. For the Fall Foyer project I chose two very tall ones to hold the branches, but for this holiday rose floral design I used a short vase. The short vase had the wiring in it which helps keep flowers and greenery in place. The tall vases themselves kept the branches in place.
3. Repurpose dried stems from other floral arrangements. For this project, remember I kept the pine cones and berries. So you might think about hanging on to any dried stems from your own arrangements, or given to you, that can be used year after year.

4. Step back and assess. This part I think is important. You need to have a vision of what look you are trying to capture. I use Instagram for a lot of inspiration, as you saw above with that gorgeous design by Lucinda Wharton. Others use Pinterest. Whichever you use, think through which decor pieces to insert first and the order you want to place them. I decided for this project to put all the dried stems in first. As you can see at the beginning of this post, for the Fall Foyer project, I put the largest and widest branches in first.

5. Next, add the roses. I started to fill in the roses by color. I slowly added different branches to the Fall Foyer project, always stepping back to assess how my design looked.

6. Next up, greenery. Remember? I had to come up with some greenery on hand. I used the same bay leaf branches in my garden for both styling projects. Who would have ever guessed our overgrown bay leaf bush would come in so handy! You may have evergreen shrubs in your yard that would work perfectly as well.

7. Fill the arrangement out. Use the roses and greenery to fill out the floral design, repositioning them to your liking. I put all the bay leaf branches on the outside of the roses. And for the Fall Foyer styling project I used varying heights of the bay leave stalks and filled in the middle of the arrangements to give the styling more depth. Below is the finished result which makes me super happy. Actually, I’ve realized I cannot live without red, white and green in my holiday decor!
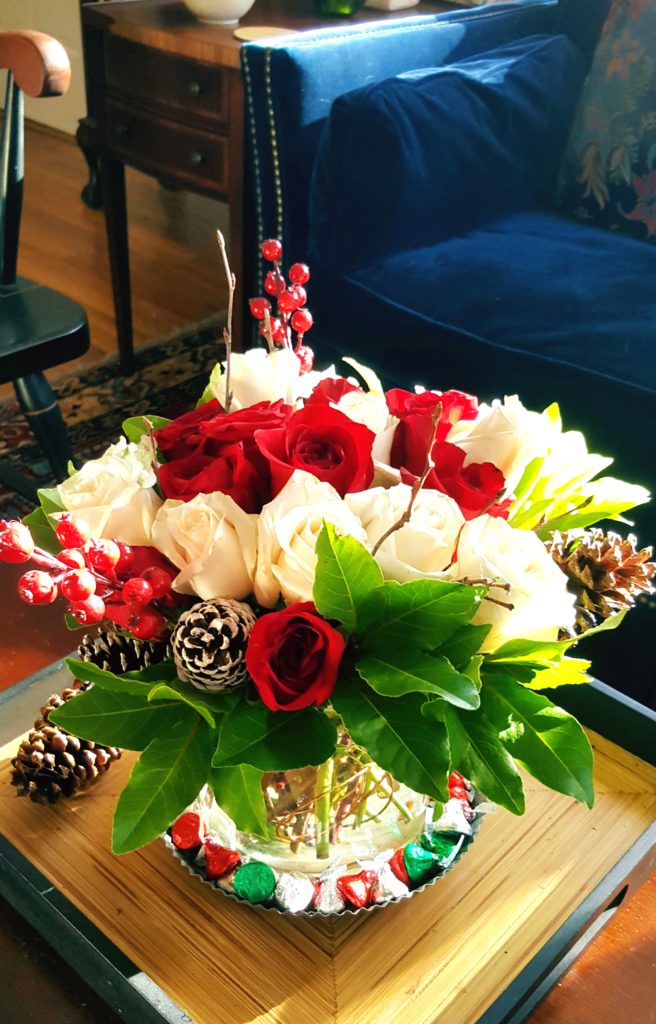
8. Lastly, add props for your table display. My husband came back from the store and said they were out of cranberries. The floral arrangement last year that Vickie brought had cranberries all around the edge in the metal stand. That’s what made it so fitting for our cranberry cocktail. (You’ll note no cranberries in the above image.). No cranberries, what’s a rookie stylist to do? I put holiday colored chocolate kisses instead. And for the Fall Foyer project, I just went around my home and grabbed items of differing heights and what I thought might look best.
Voila! The finished holiday floral arrangement below.
We will use this new red and white holiday floral arrangement above for the centerpiece of our dining table for Christmas dinner, just like we did last year with the arrangement below. (They look pretty similar, right? I was pleased with the outcome.) But this year the floral centerpiece will be under our new Lamps Plus crystal chandelier. (Be sure to check out the blog post on our first Chandelier Diaries Dinner Party and see all of Vickie Flaugher’s amazing photography.)

Till next time, which might be 2019, thanks again for all your well wishes, prayers, Facebook comments, love and support. I am so blessed!! I wish you and your family and friends a very Merry Christmas and Happy New Year! XO PG
No Comments